DIY Christmas Reindeer Headband: How to Make and Color Step by Step

Looking for a fun and festive Christmas coloring craft? This step-by-step guide will show you how to design, color, and assemble your very own reindeer headband and Rudolph nose. Perfect for Christmas parties, school plays, or cozy holiday fun at home!
It’s a cheerful and creative activity that lets kids bring Rudolph to life while expressing their imagination; color the antlers, add your own patterns, or decorate the ears with sparkly details!
By the end, you’ll have a wearable reindeer headband complete with bright antlers, cozy ears, and a shiny red nose, ready to wear or gift to someone special.
⚠️ Adult supervision is required. Some steps involve scissors and glue, which should be handled carefully by an adult or with close supervision.
What You Will Need
- Blank sheet of card or thick paper (A4, Letter, or similar)
- Pencil and eraser
- Black marker or pen (for outlining)
- Non-toxic coloring supplies (markers, crayons, or colored pencils)
- Scissors (safety scissors for kids)
- Glue stick (non-toxic) and tape (safe, skin-friendly double-sided tape or foam pad (for attaching the nose).
- Headband (plain or wrapped)
Safety Notes
- Scissors: Always use child-safe scissors when possible. Adults should handle or closely supervise cutting steps.
- Glue/Tape: Use non-toxic adhesive and ensure all parts are securely attached.
- Adhesive Nose: Only use skin-safe, non-toxic tape or foam pads for the nose attachment.
- Headband Fit: Choose a soft, flexible headband that fits comfortably and isn’t too tight. Fabric-covered or padded bands work best to prevent discomfort.
- Work Surface: Use a flat, clean area to prevent slipping while cutting or coloring.
DIY Christmas Reindeer Headband Step by Step Guide
Step 1:
Cut out a long rectangular strip of white card or paper. This will form the base band for your reindeer headband craft.

Step 2:
Fold the paper strip in half vertically to mark the center. This fold will help you align the reindeer headband pieces evenly in later steps.


Step 3:
Using a pencil, draw one half of a reindeer antler along the folded edge of the paper. This will create symmetrical antlers when you cut it out and unfold it.

Step 4:
Trace over your pencil sketch with a black marker or pen to make the reindeer antler outline bold and clear for coloring and cutting.

Step 5:
Use a brown marker, crayon, or colored pencil to color in the reindeer antler shape. Make sure to stay within the black outline for a neat finish.

Step 6:
Carefully cut along the outer edge of the reindeer antler shape while keeping the paper folded. This will create two identical antlers when you unfold it, ready to wrap around the headband. An adult should handle the cutting.


Step 7:
Repeat the same steps to create the second reindeer antler. You should now have two matching antlers ready to attach to your headband.

Step 8:
Cut another strip of white card or paper – this will be used to draw, color, and cut out the reindeer ears that go between the antlers on your headband.

Step 9:
Fold the card strip in half, just like before. This fold will help you draw and cut two identical reindeer ears for your headband.

Step 10:
Use a pencil to sketch the shape of a reindeer ear.

Step 11:
Trace over the pencil outline of the reindeer ear with a black marker to make it bold and easy to color and cut out.

Step 12:
Color in the outer section of the reindeer ear with a brown marker to match the antlers.

Step 13:
Use a light yellow or beige marker to color the inner part of the reindeer ear. This contrast adds a realistic touch and makes your reindeer headband look extra cute and festive.

Step 14:
Carefully cut out the colored reindeer ear along the outer black outline. Take your time to keep the edges smooth – this ear will be attached to your headband next to the antlers. An adult should handle the cutting.


Step 15:
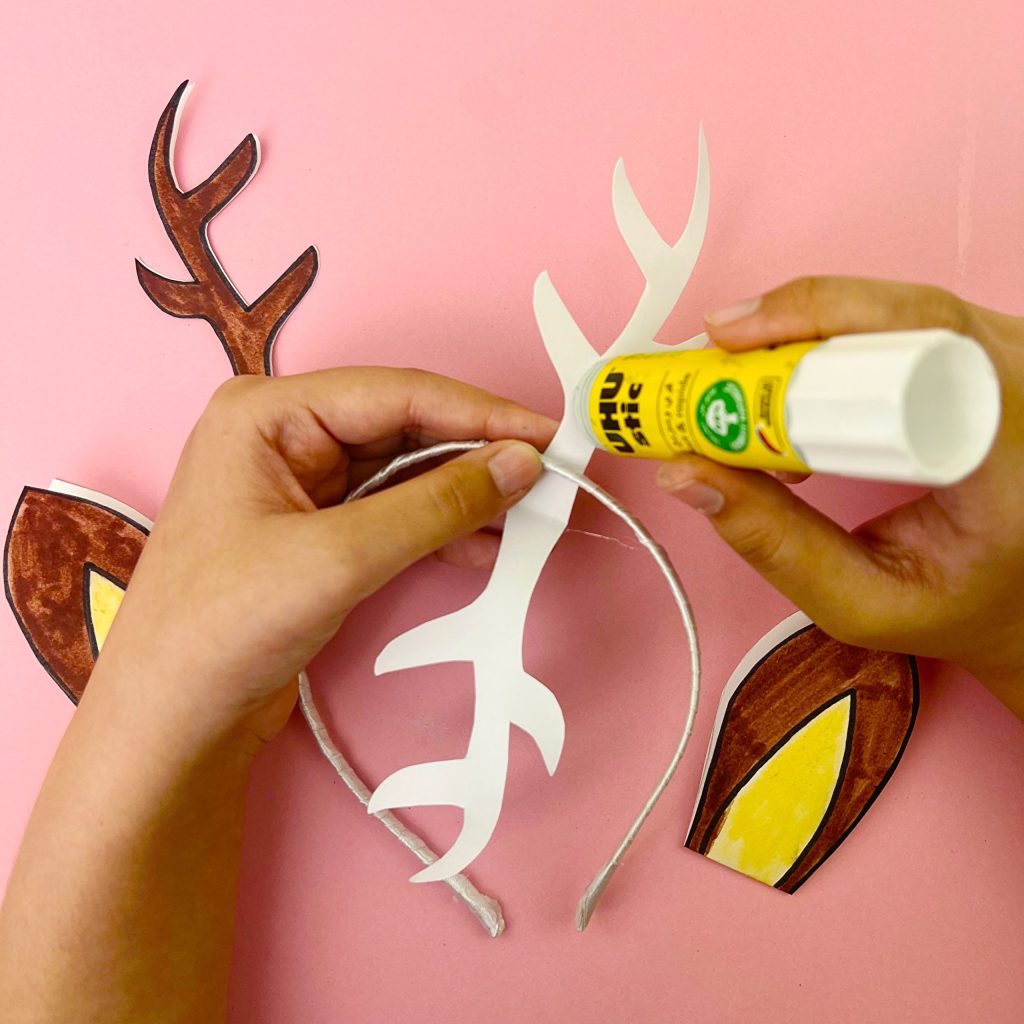
Find your comfortable headband and grab a glue stick. You’ll be attaching the reindeer antlers and ears next – make sure you have them all laid out and ready to go!
Tip: Choose a soft, flexible headband that fits comfortably and isn’t too tight. Fabric-covered or padded headbands work best to keep it gentle on little heads during playtime.

Step 16:
Apply glue to the inner sections of the antlers and ears, then wrap them around the headband, pressing firmly so both sides stick together securely.


Step 17:
Place a small square piece of card on your workspace – it’s time to draw and color a bright red nose to complete your Rudolph headband!


Step 18:
Add a piece of safe, skin-friendly double-sided tape or a non-toxic foam adhesive pad to the back of your red nose.

Step 19:
Your Rudolph headband and red nose are complete! Carefully put on your new headband, and make sure the adhesive for your nose is safe, skin-friendly, and non-toxic so you can enjoy your festive reindeer look comfortably and safely.

Let us know how your Christmas reindeer headband and nose turned out in the comments.