How I Draw Digital Coloring Pages (Step-by-Step Guide)

Hello! I am Bellamere and I design the cozy pages here at Coloring Bunny. I’d love to share how you can create your own coloring pages. Drawing coloring pages is fun and relaxing, it’s a way to express creativity, and is easier than you might think.
Just by following the steps below, you can turn your ideas into pages ready to be colored and enjoyed.
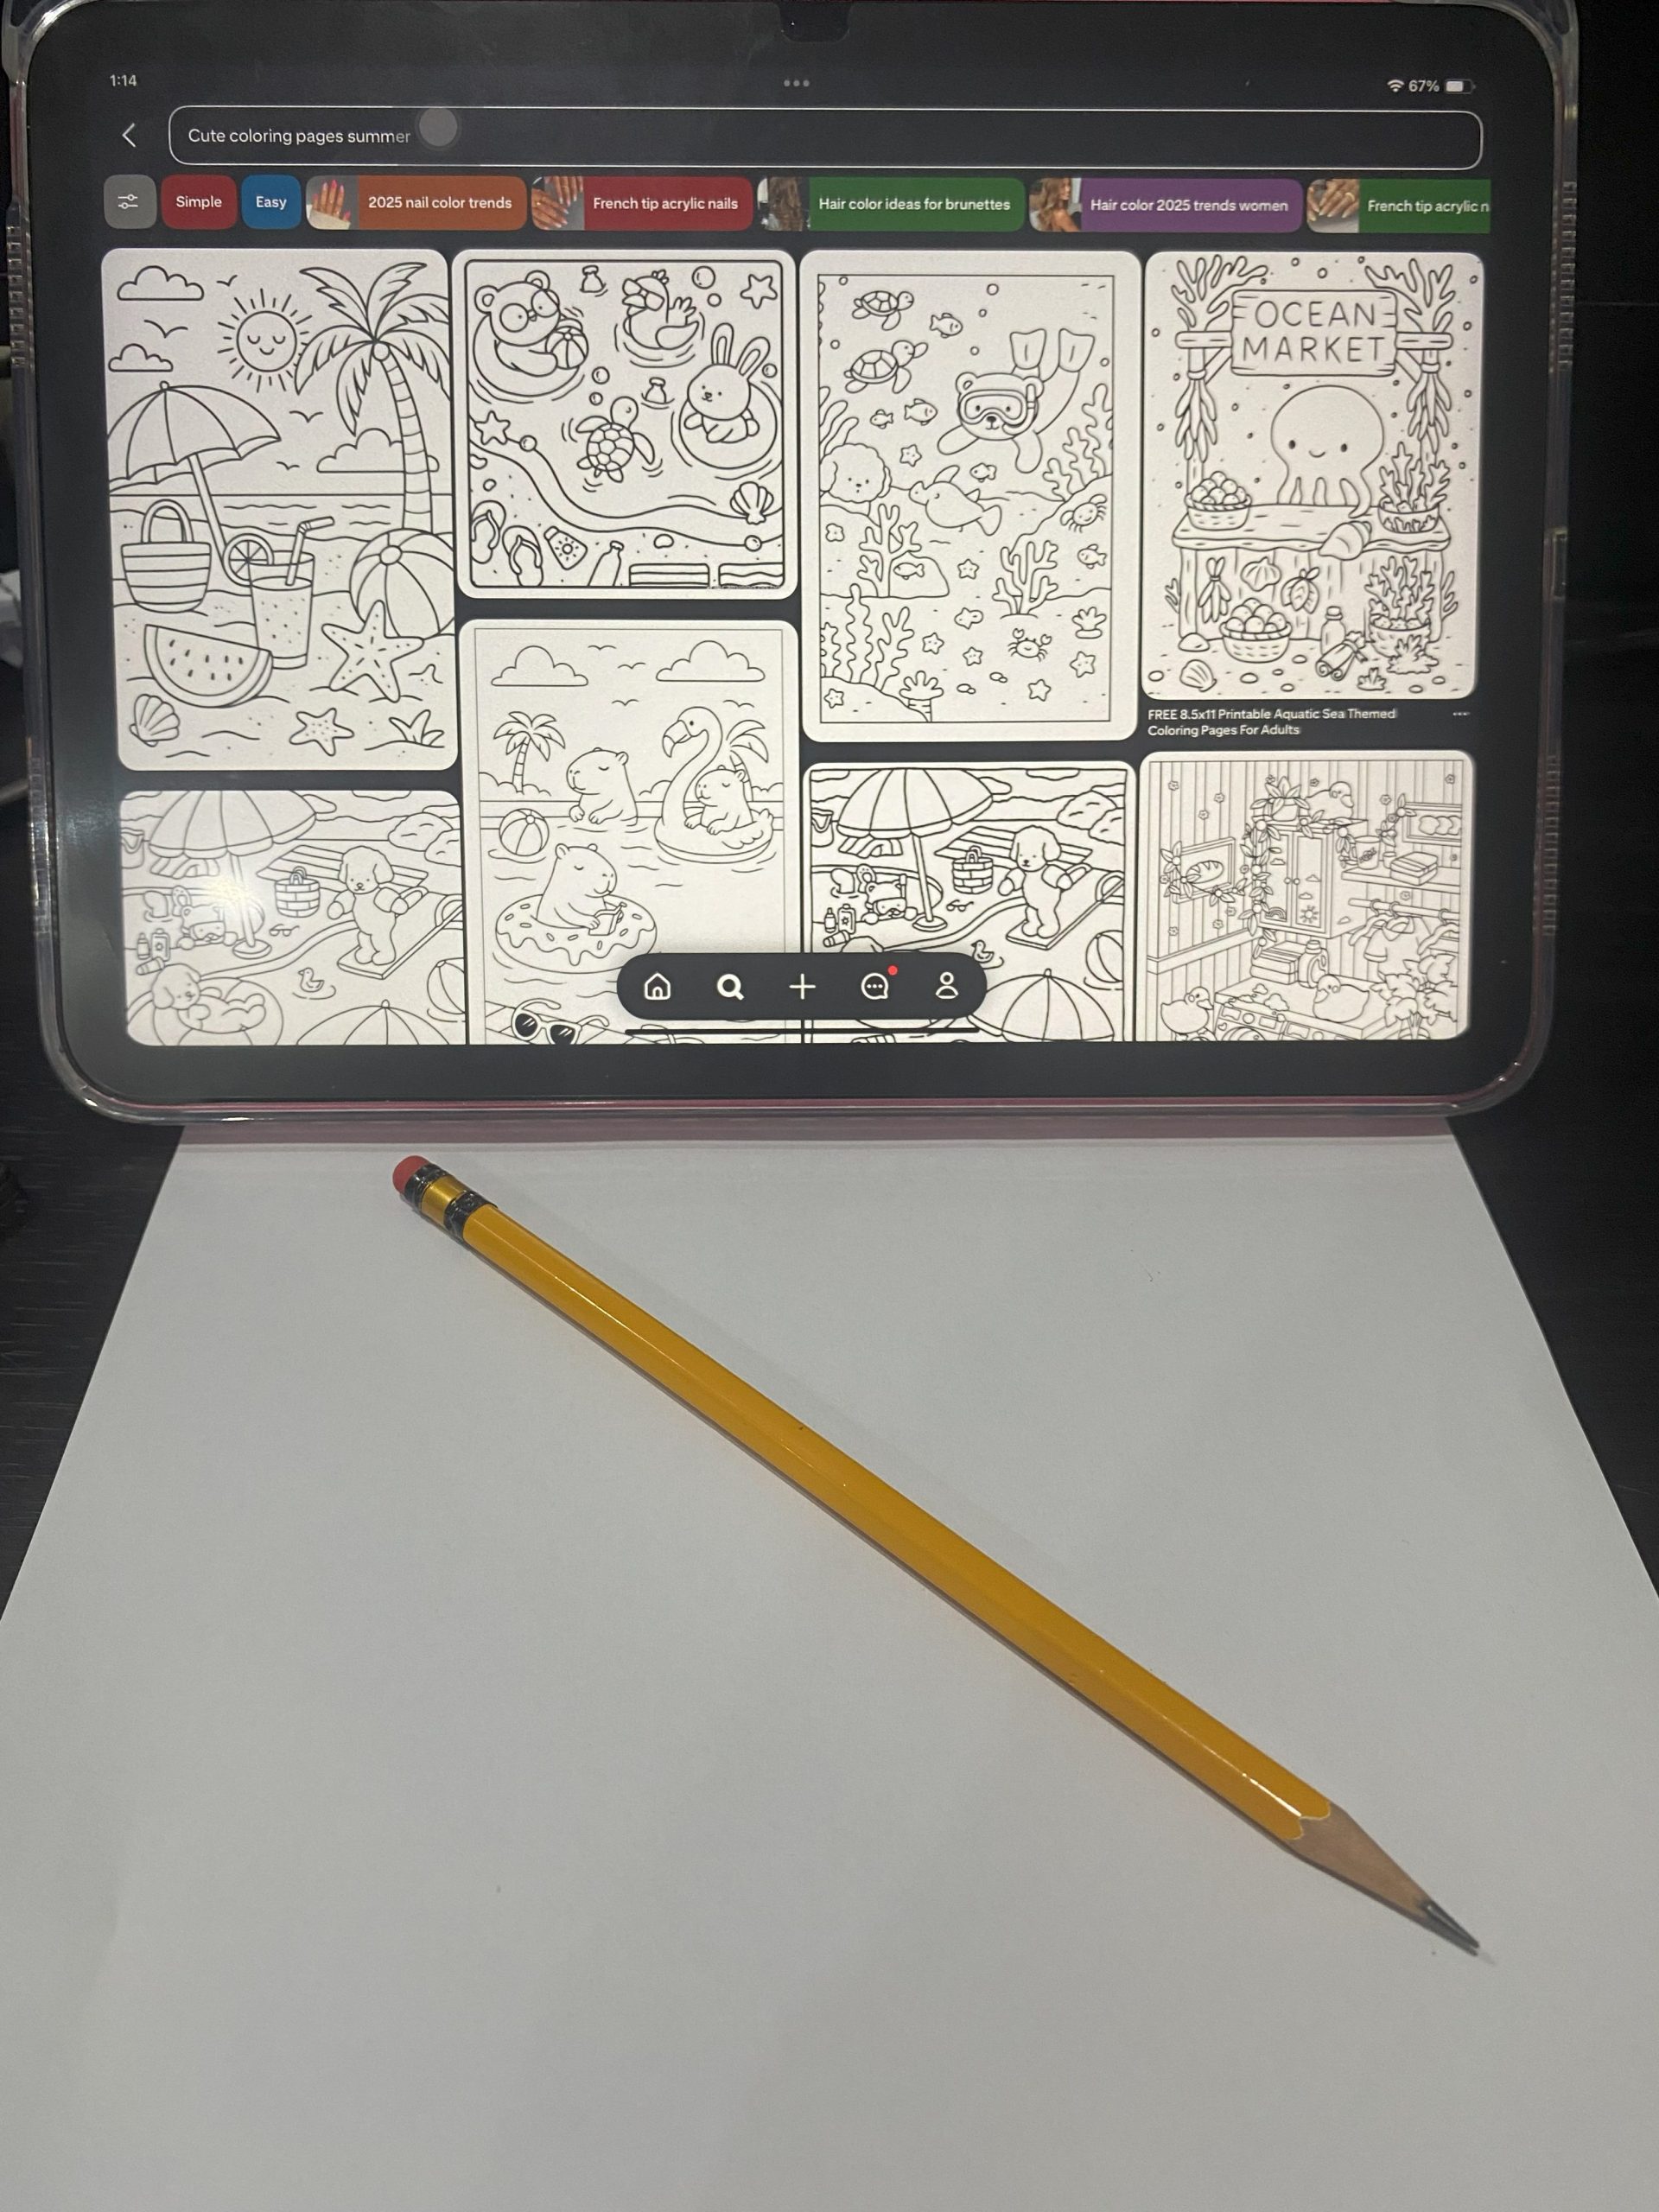
1. Rough sketches on scratch paper
I grab some scratch paper and begin imagining how my ideas could turn into sketches. When I’m looking for inspiration, I often turn to Pinterest for sample coloring pages and occasionally use AI to spark new ideas. Sometimes we can struggle to come up with fresh ideas on our own, and that is perfectly okay.
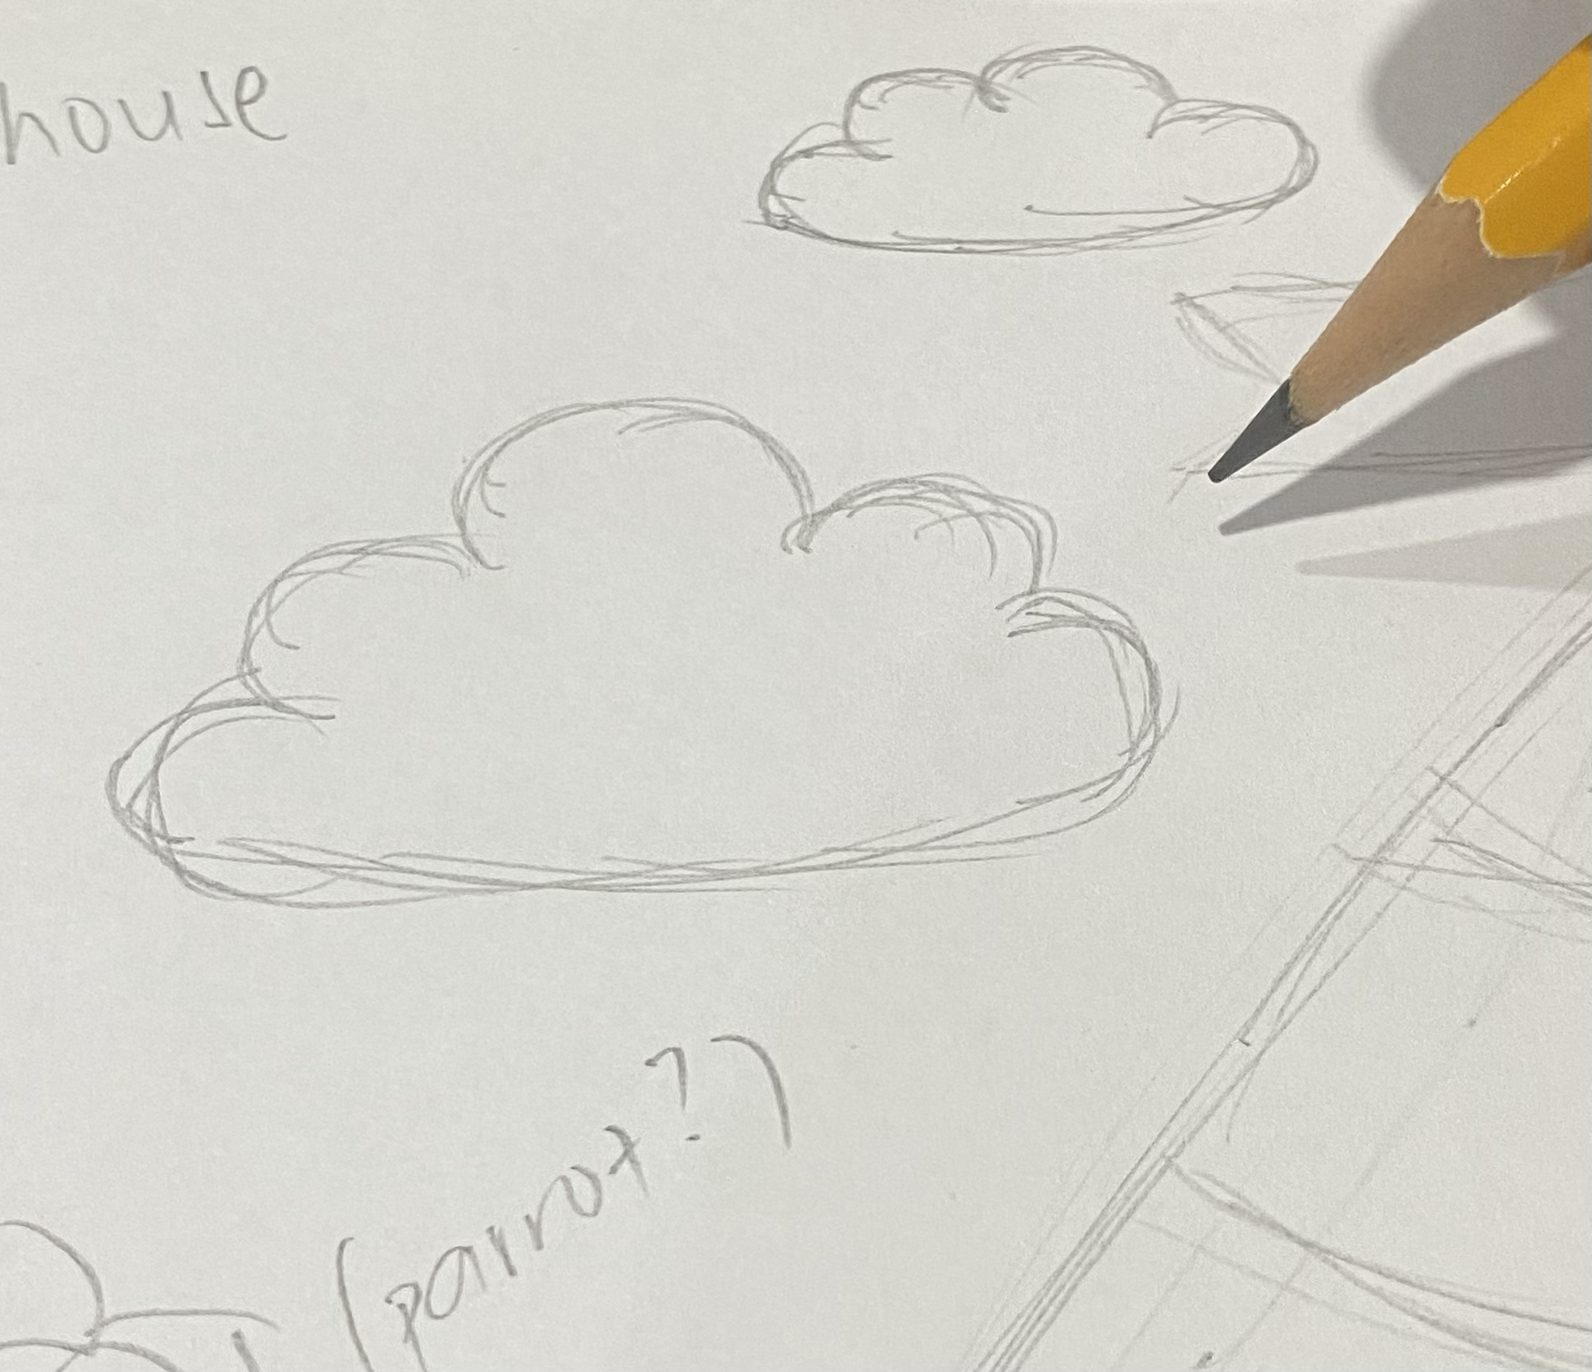
2. Make them cutesy and wobbly
I try not to leave my drawings flat or stiff. Instead, I round out the shapes to add character. Take these clouds, they’re not made of straight lines, but gentle curves that make them feel more alive.
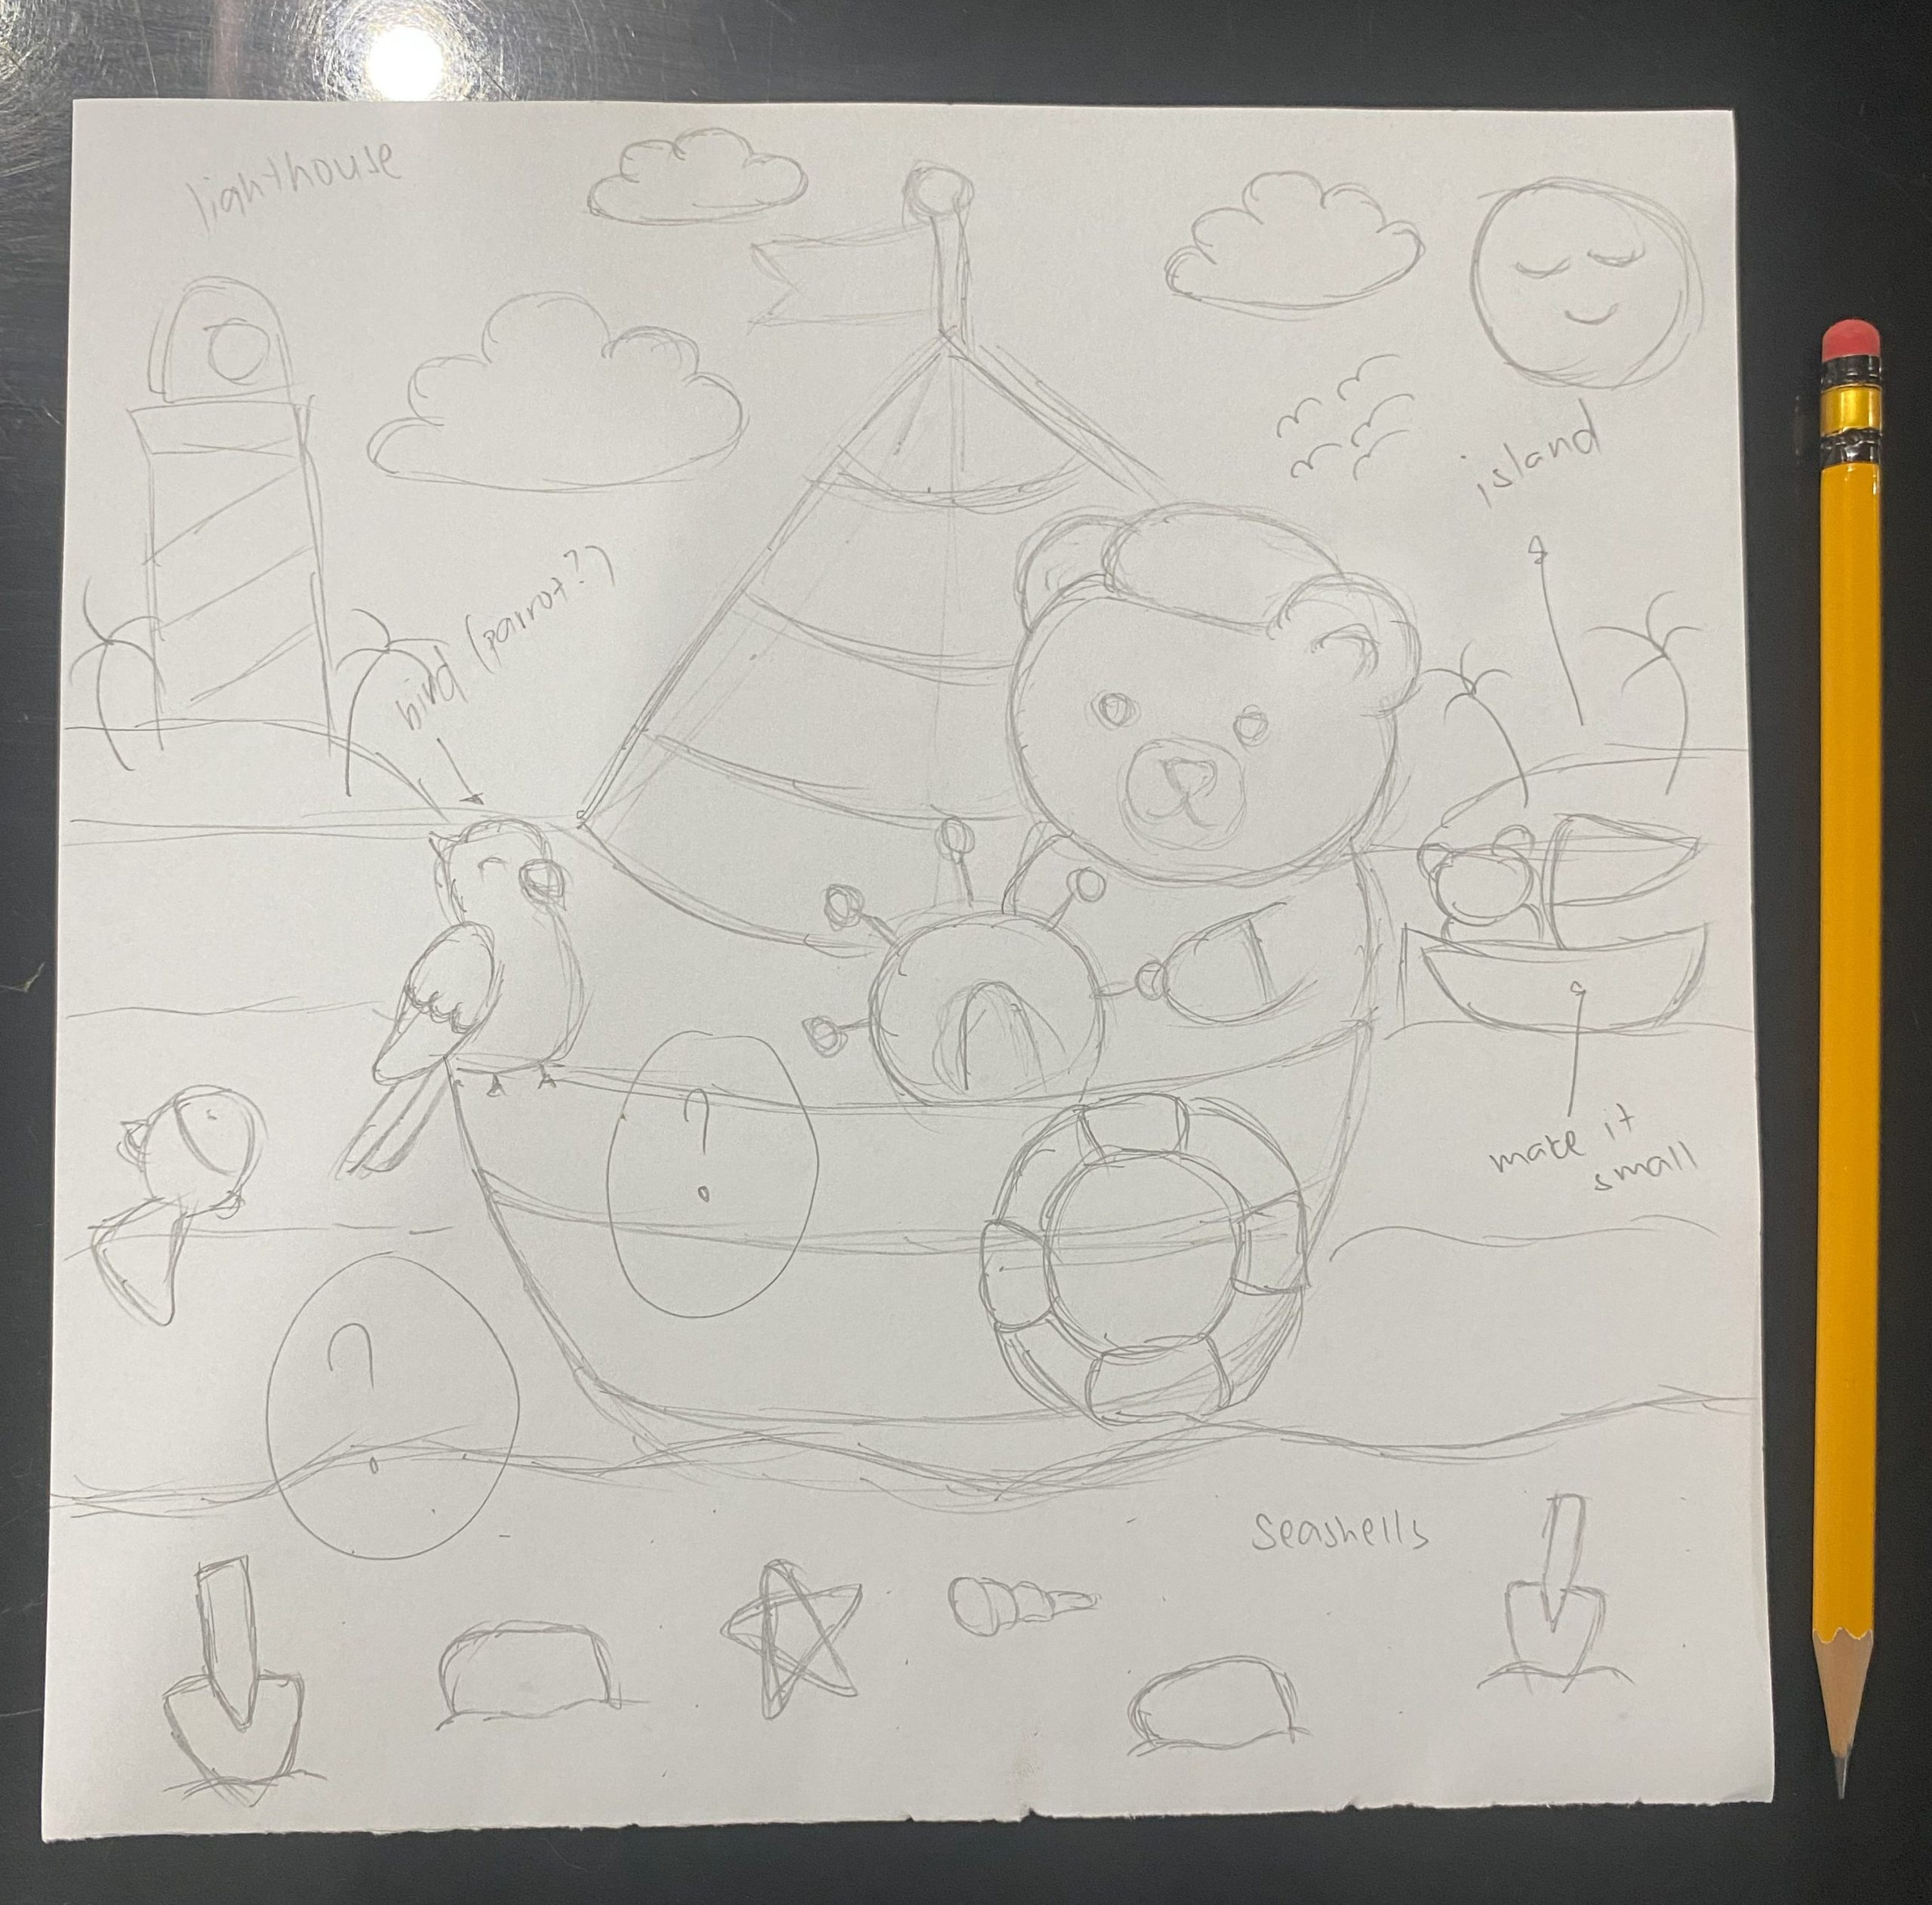
3. Completing the messy sketch
Once I’ve drawn the main details, I’ll often leave little empty spots marked with question marks if I’m unsure what should go there. If inspiration doesn’t come, I’ll ask AI for ideas that could match and fill the space naturally.
4. Where iPad enters the scene
Once the messy sketch is done, I move to a square 1:1 canvas on my drawing app. I stick to 2048×2048 pixels for high quality results. I like using Ibis Paint X (free iOS App or Google Play App) because it feels simple to use and I’m most comfortable with it.
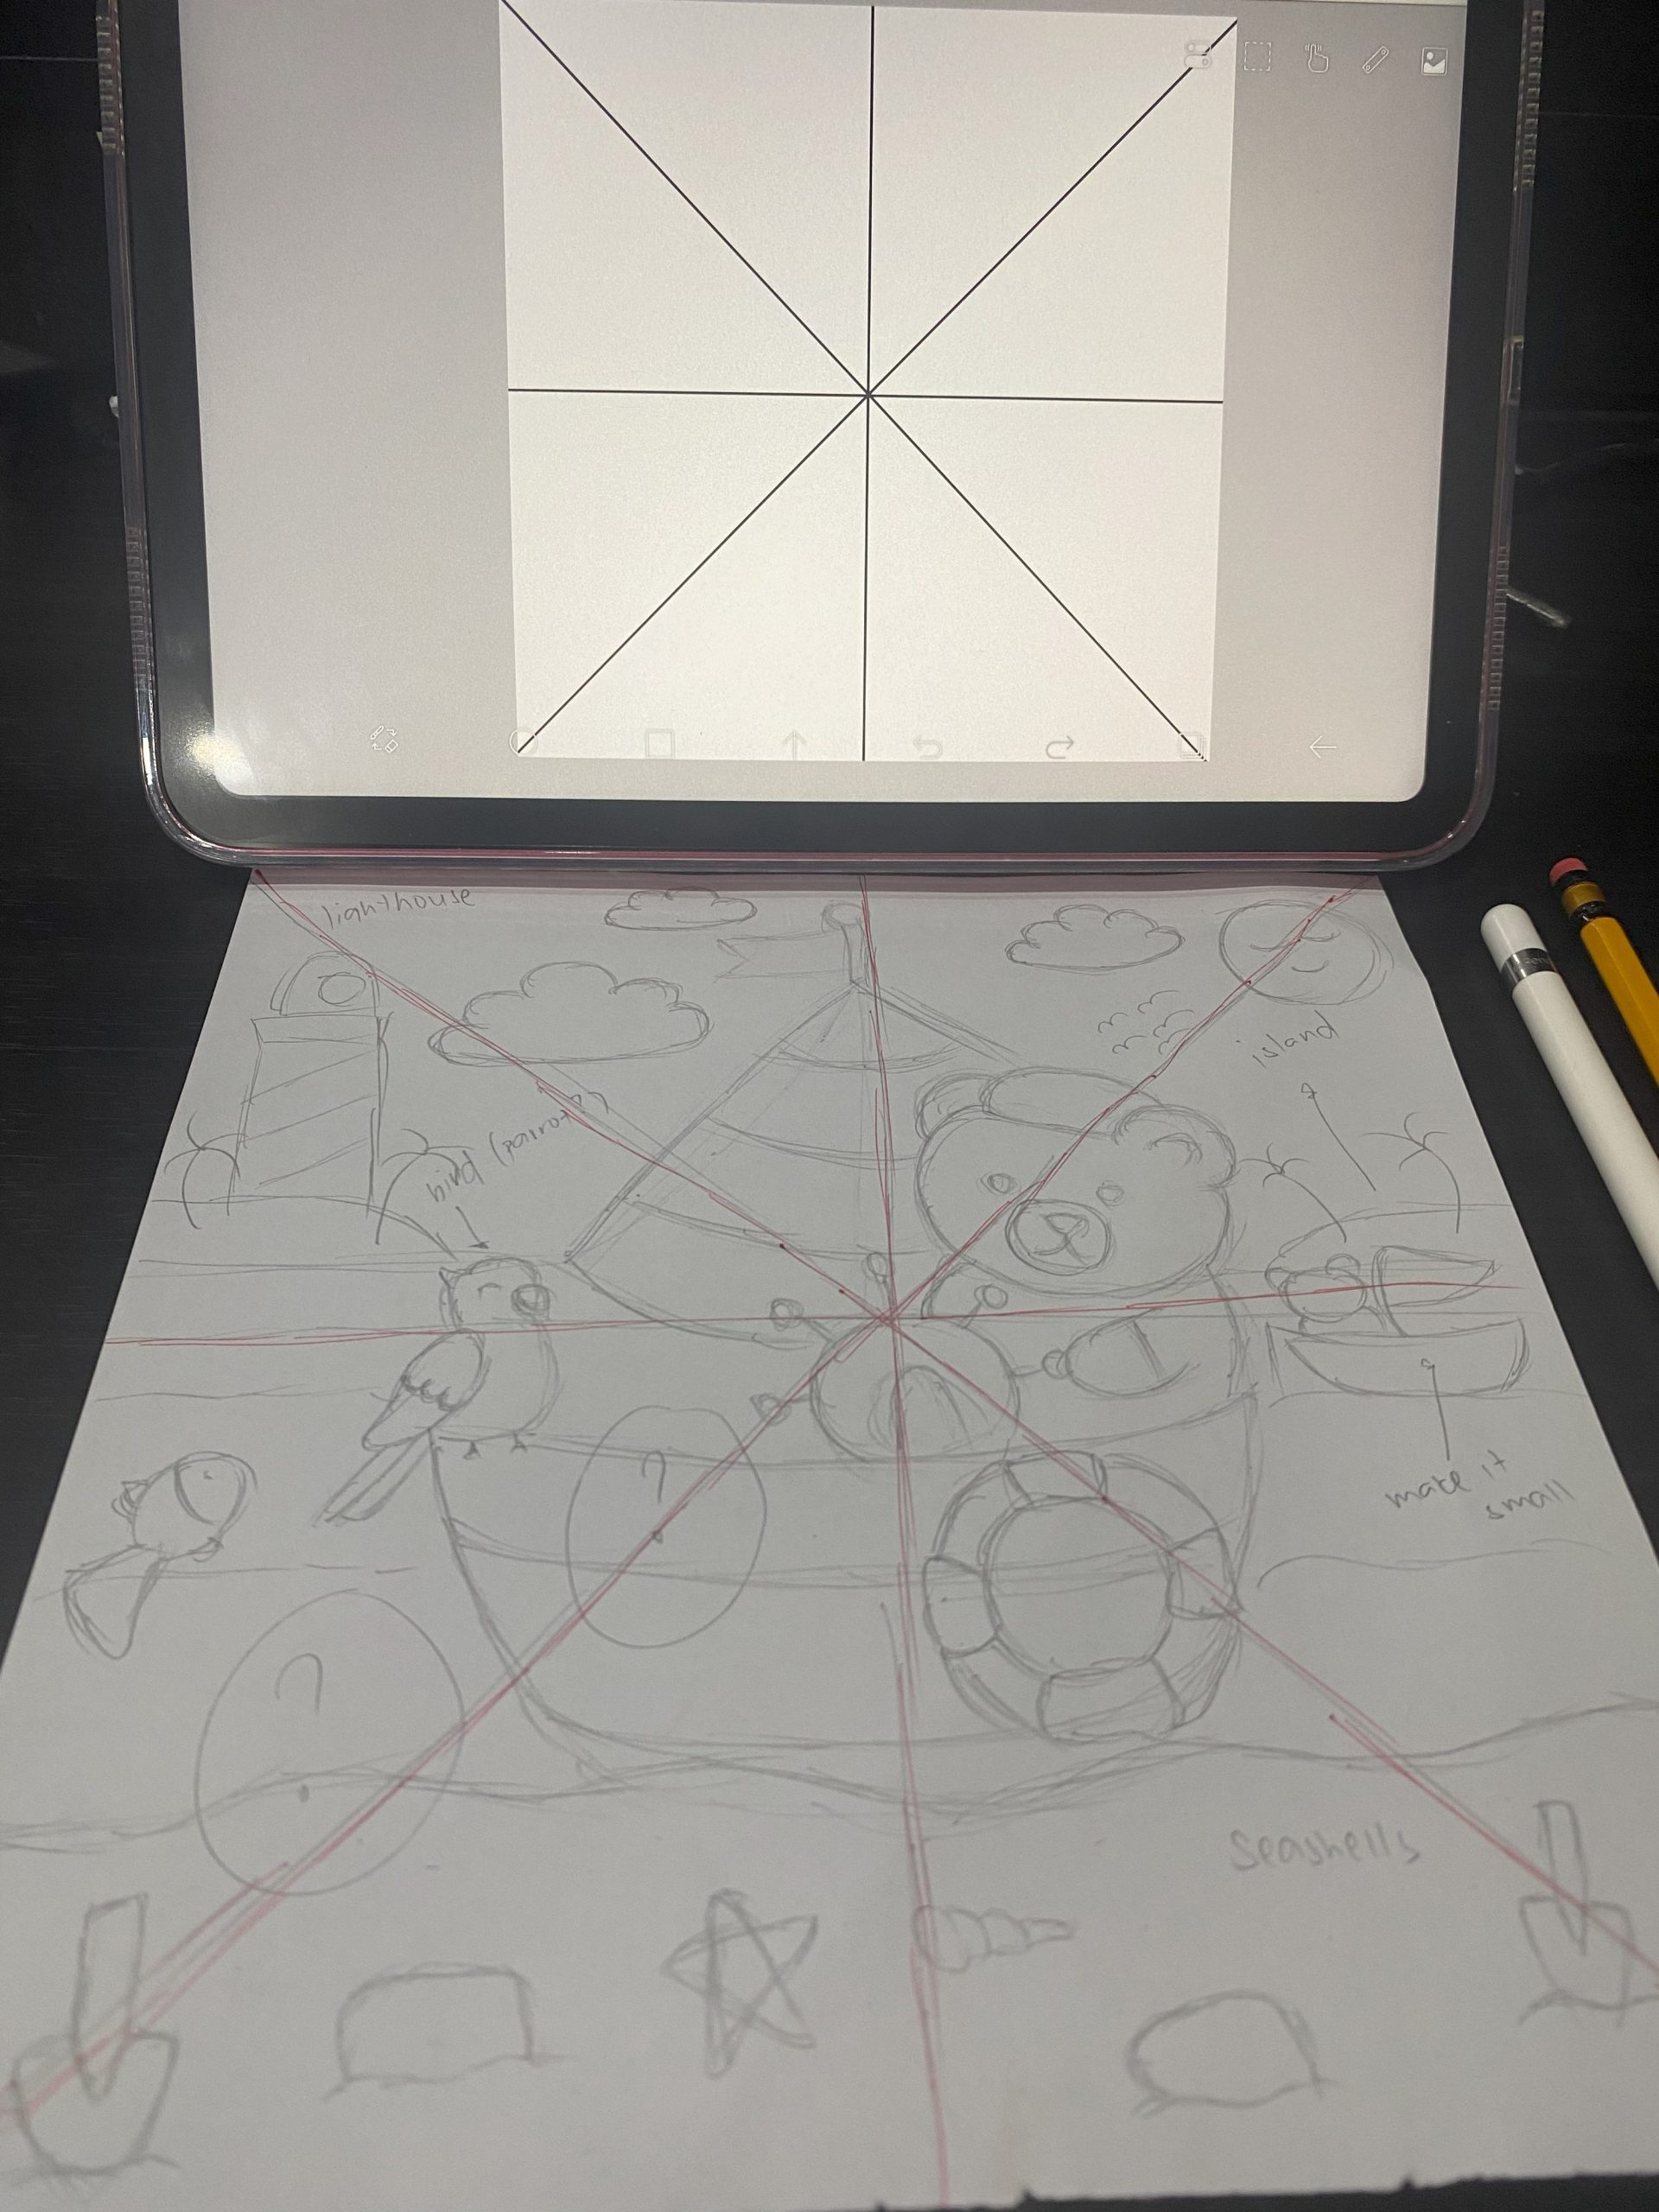
5. Secret Tip #1: I use grids!
I switch to a different kind of grid, it makes it much easier to see where I should place my drawings.
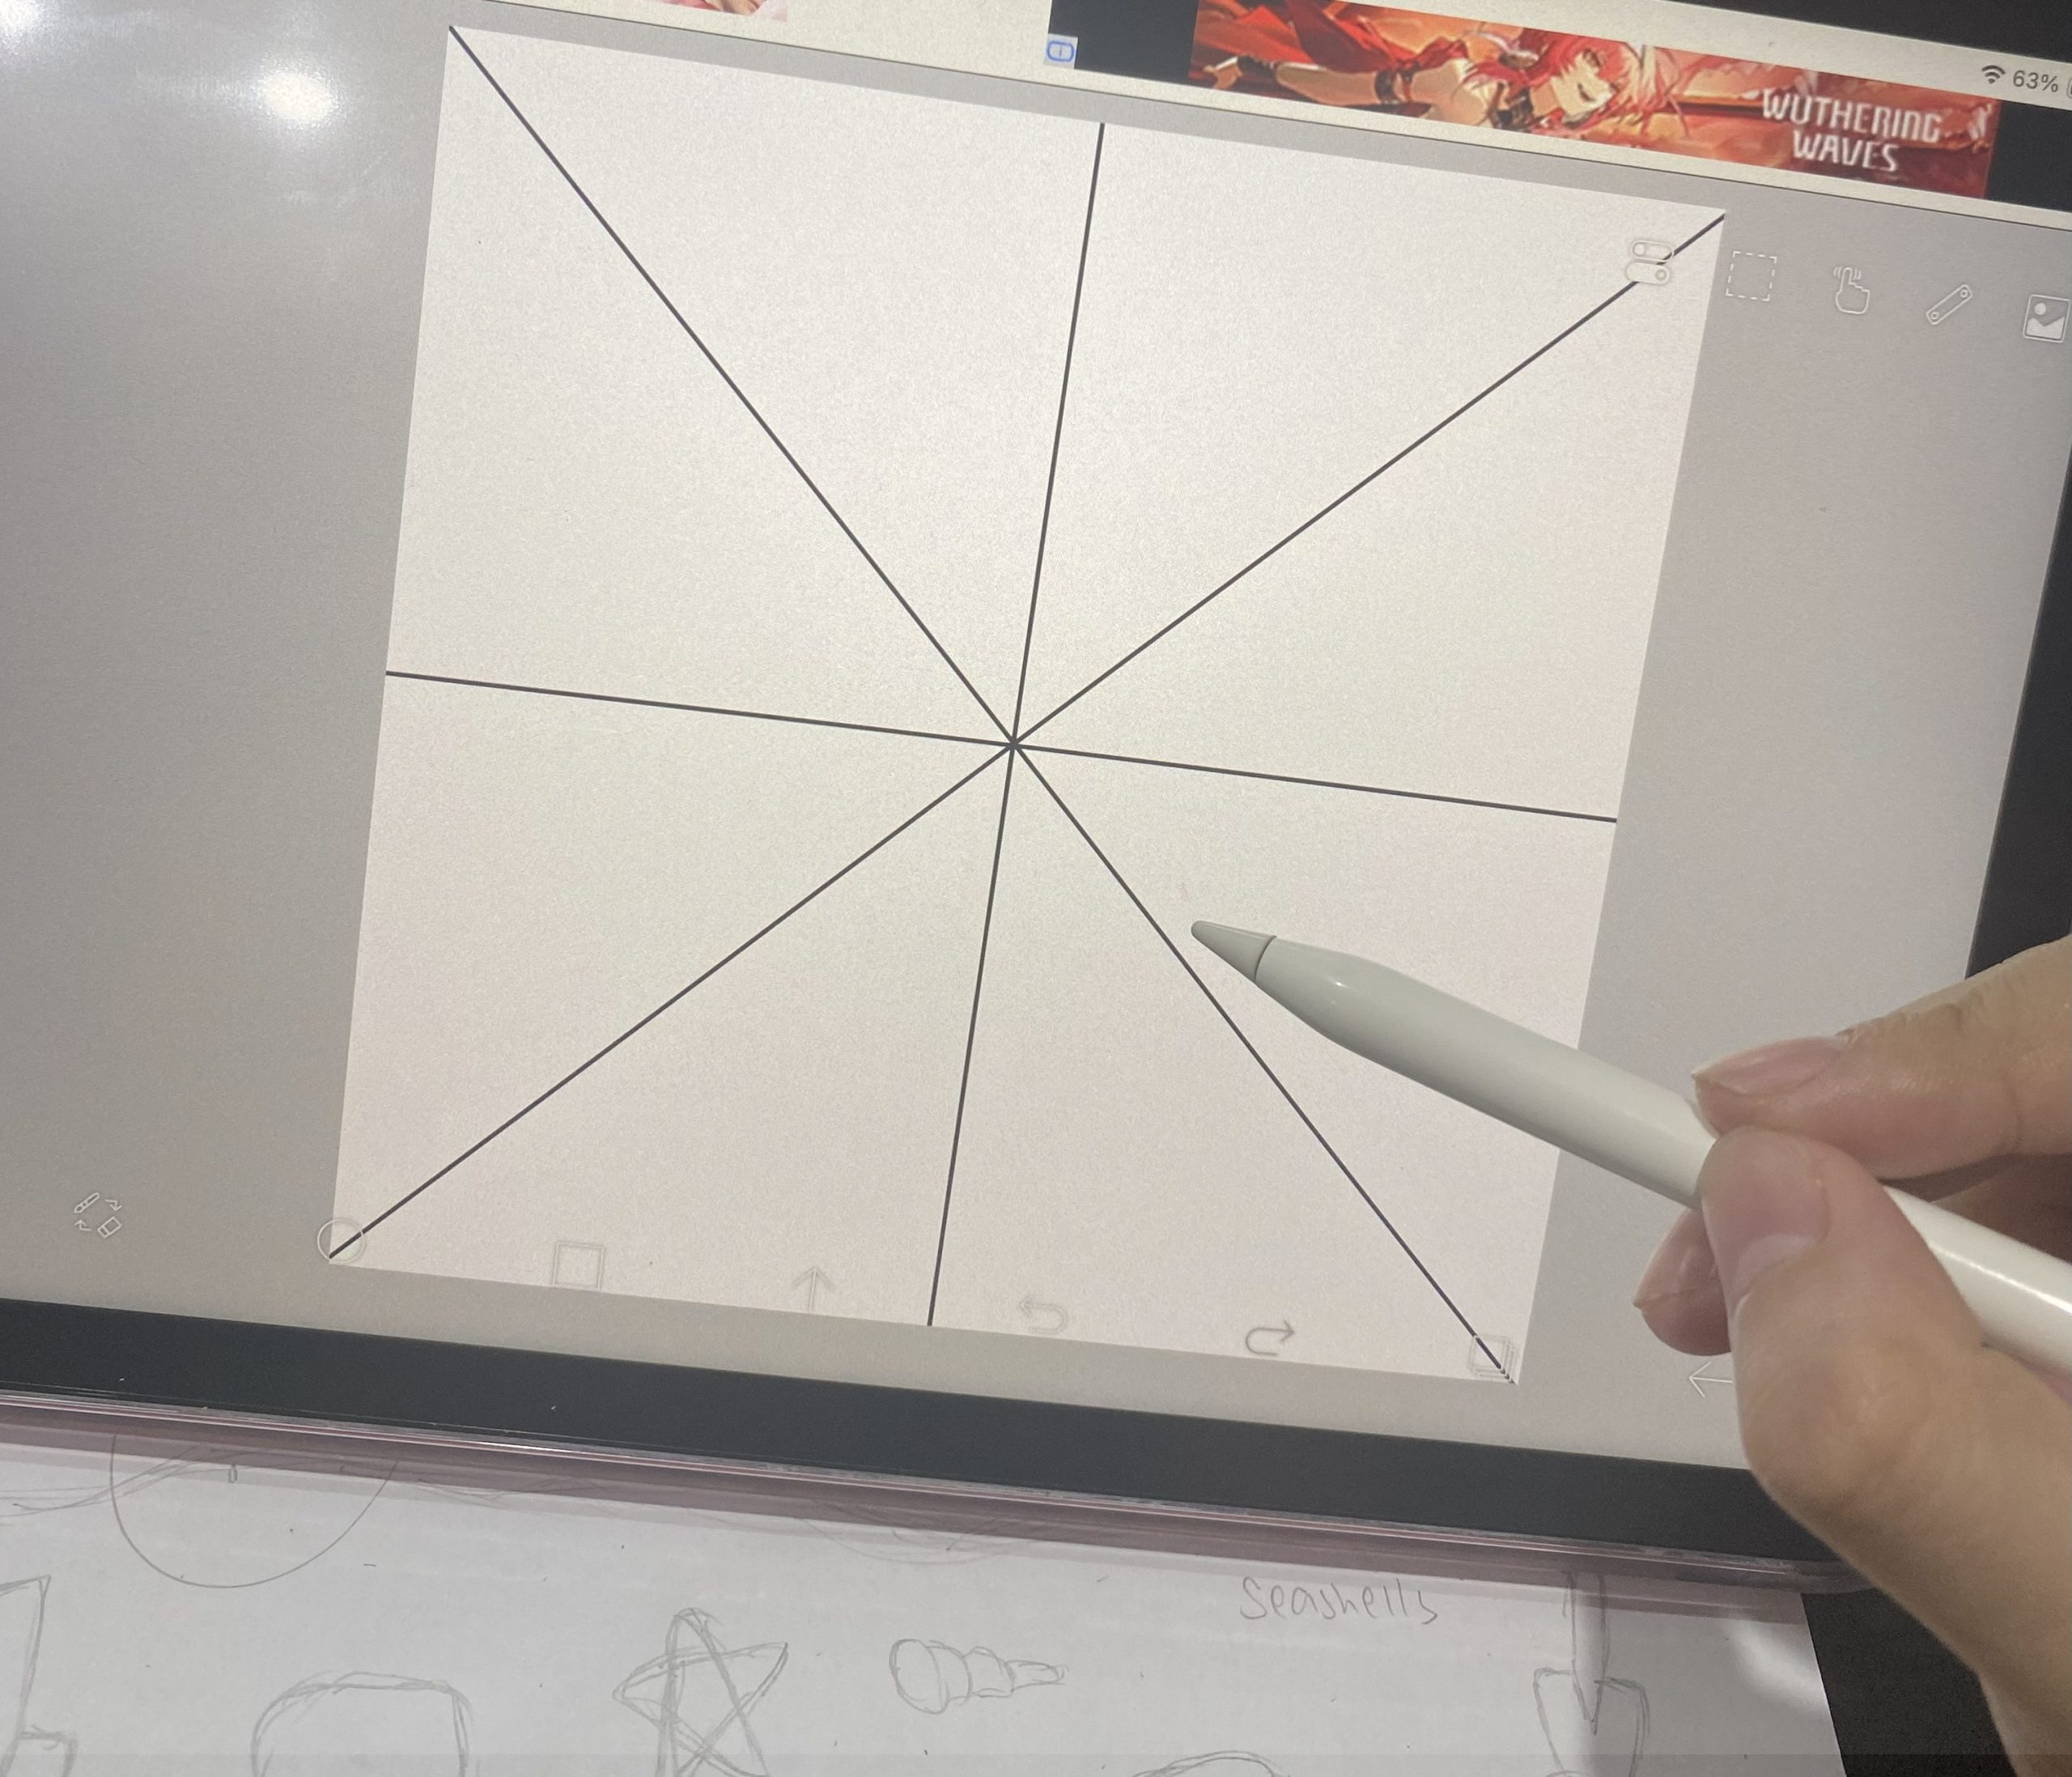
6. Another grid!
I draw the same grid over my messy sketch. It works as a simple guide so I know exactly where to place the first lines once I start redrawing on the iPad.
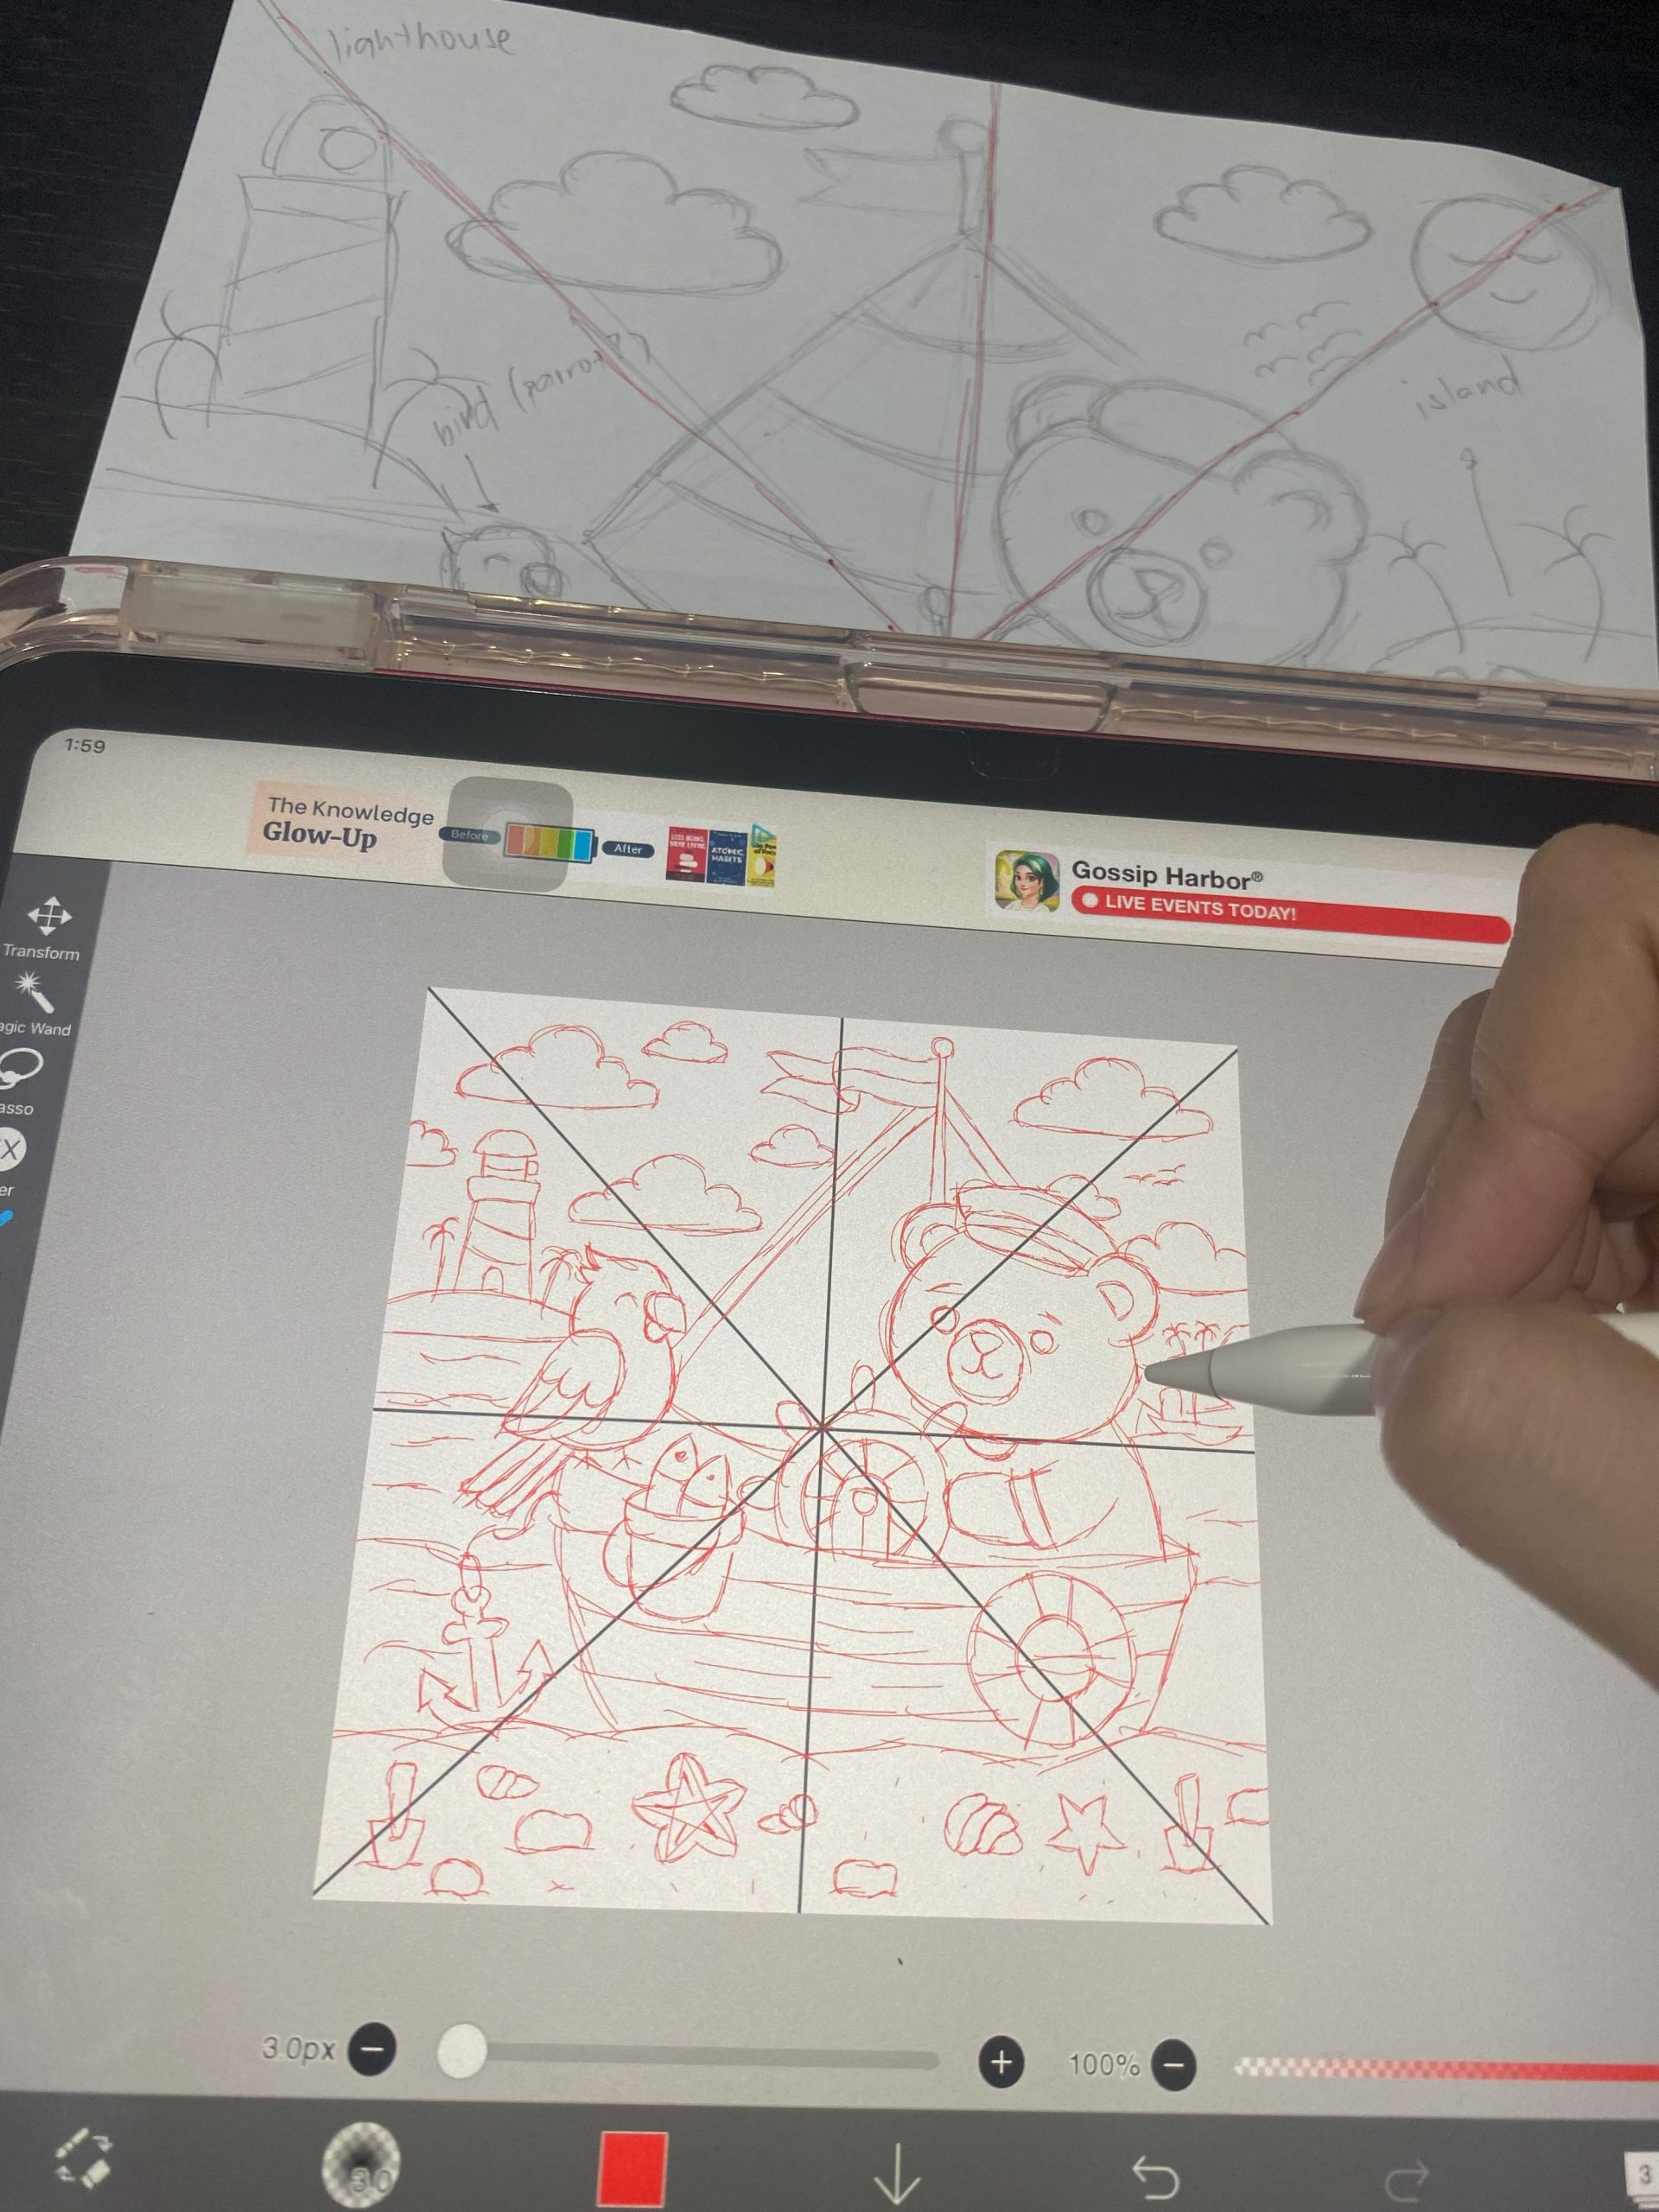
7. Starting the real sketch
With the grids and rough sketch in front of me, I start tracing out the scene more neatly, using a thin pen to lay down the lines.
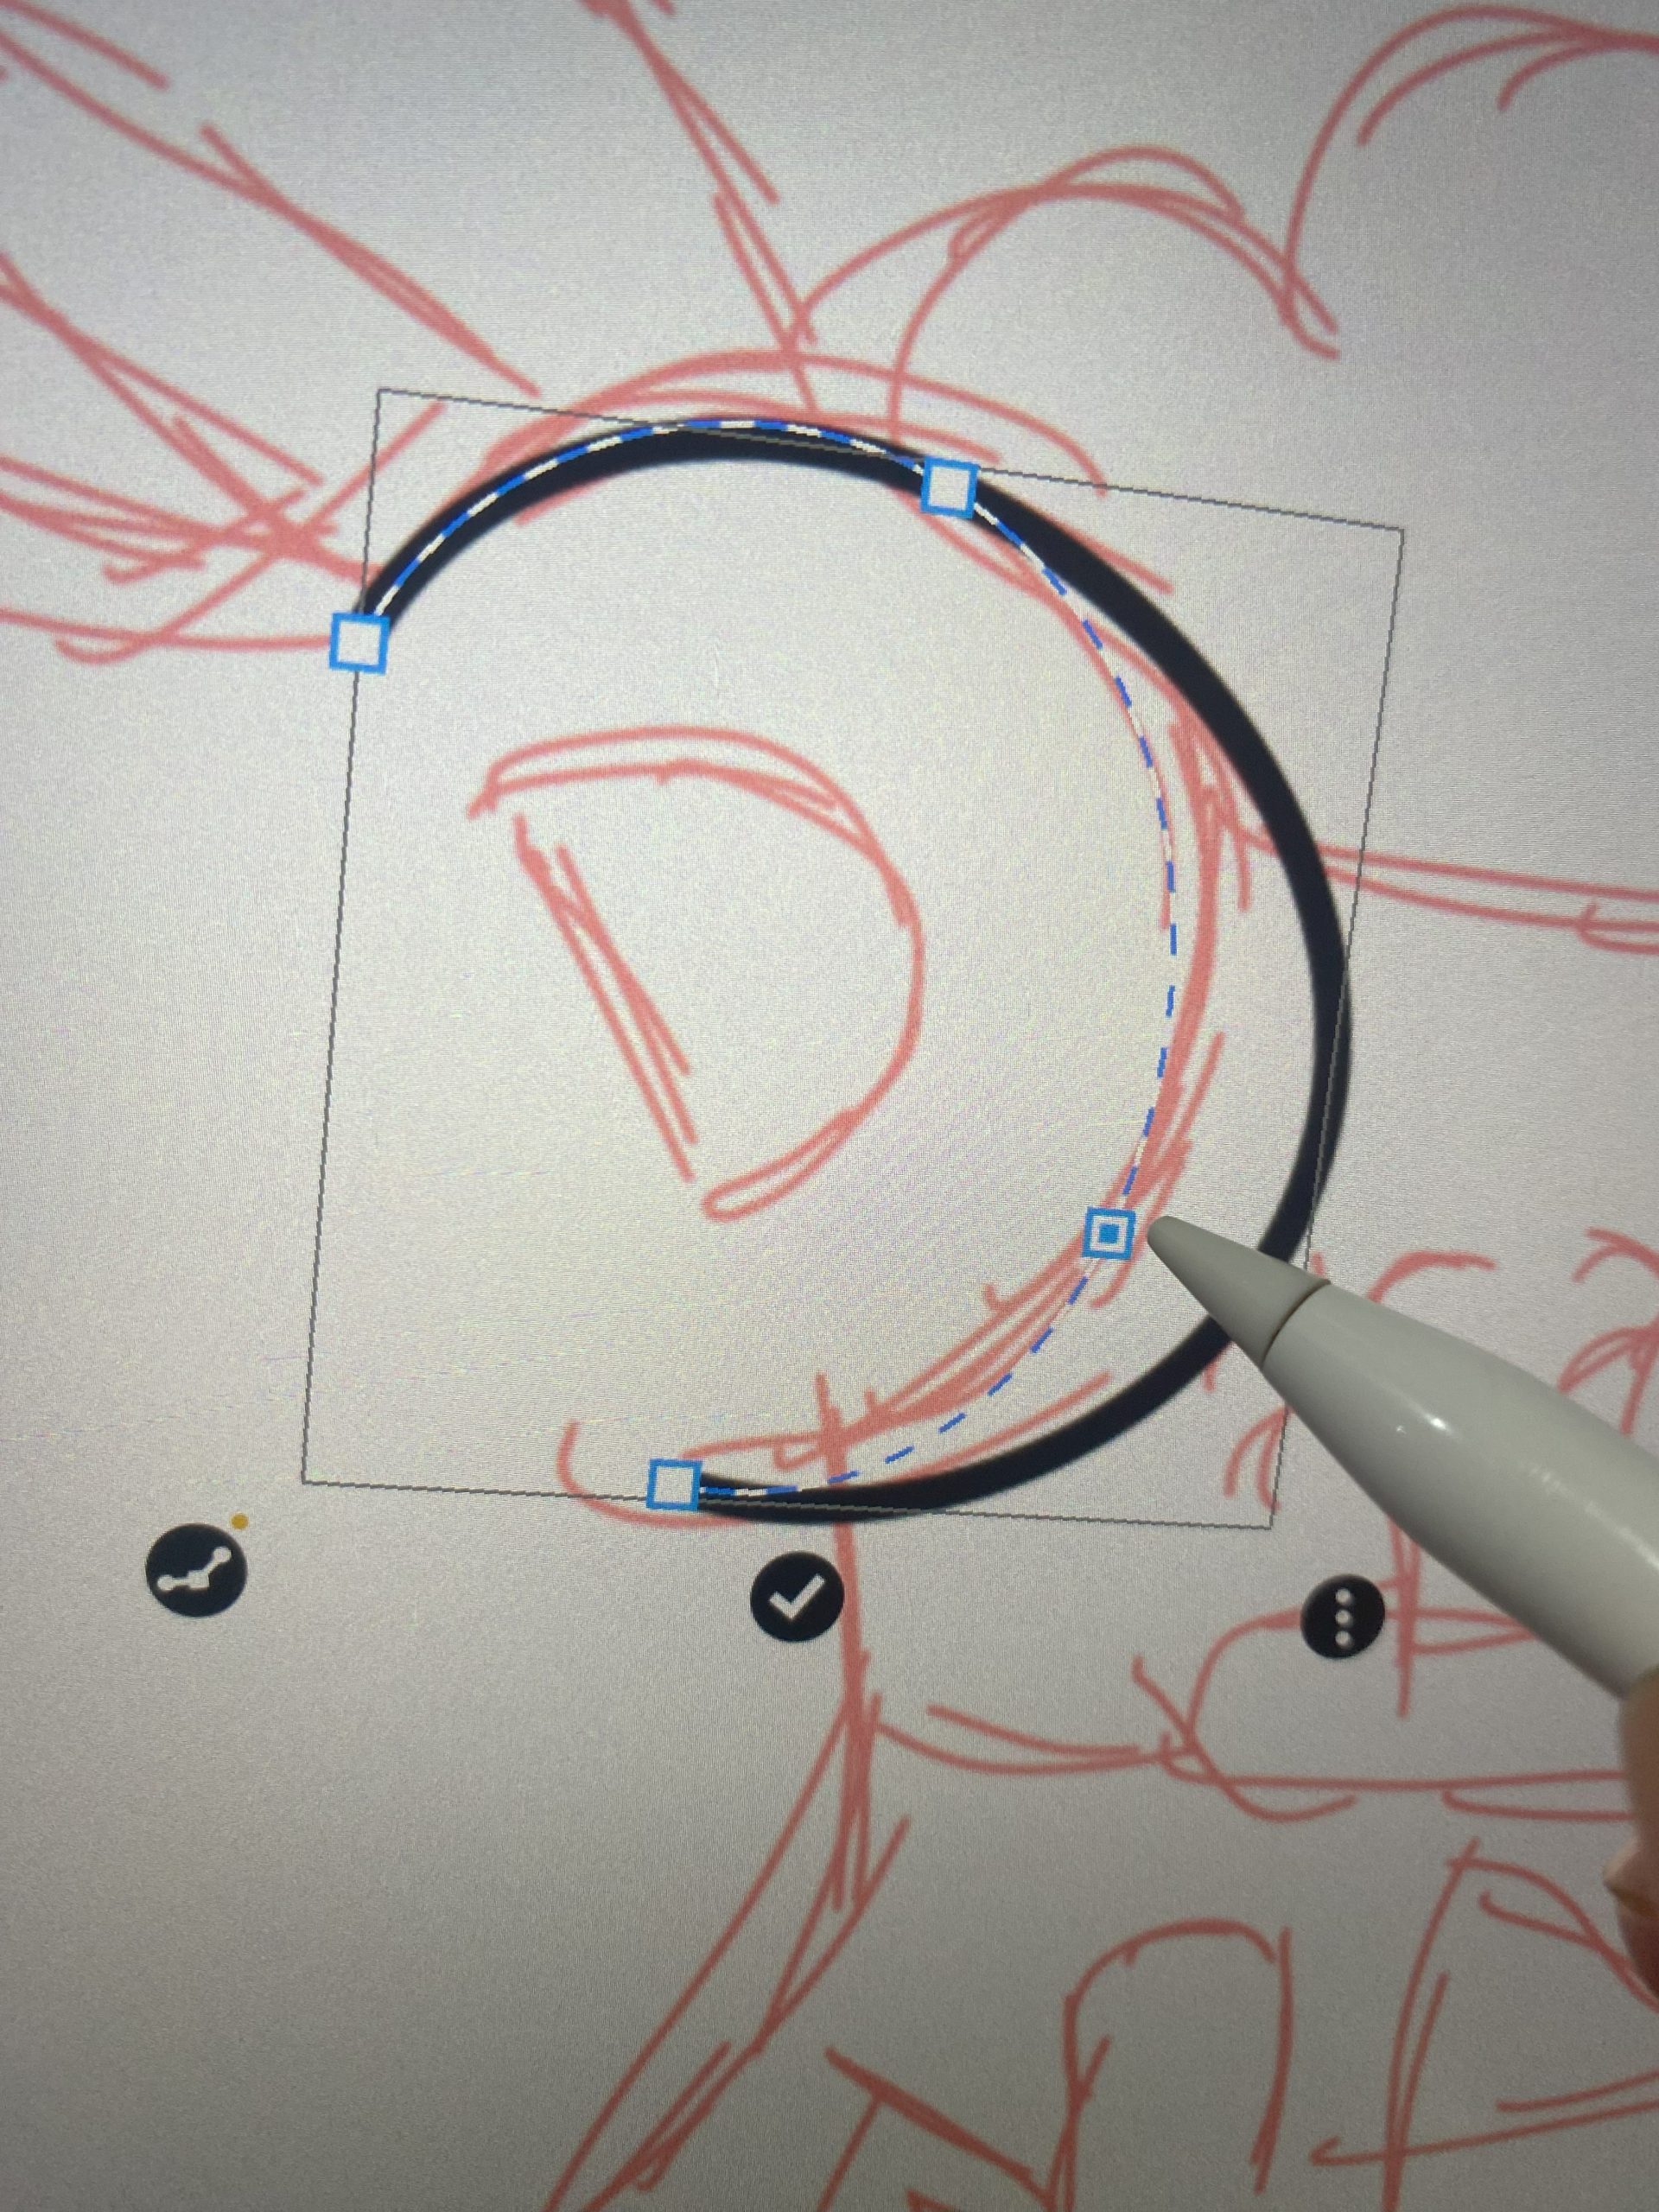
8. My favorite part, outlining!
I really only use one tool in Ibis Paint X: the “Bézier Curve.” I skip stabilization and fancy paid pens, the curve drawing tool does it all! Whether I need straight lines or flowing curves, Bézier makes every outline smooth and easy.
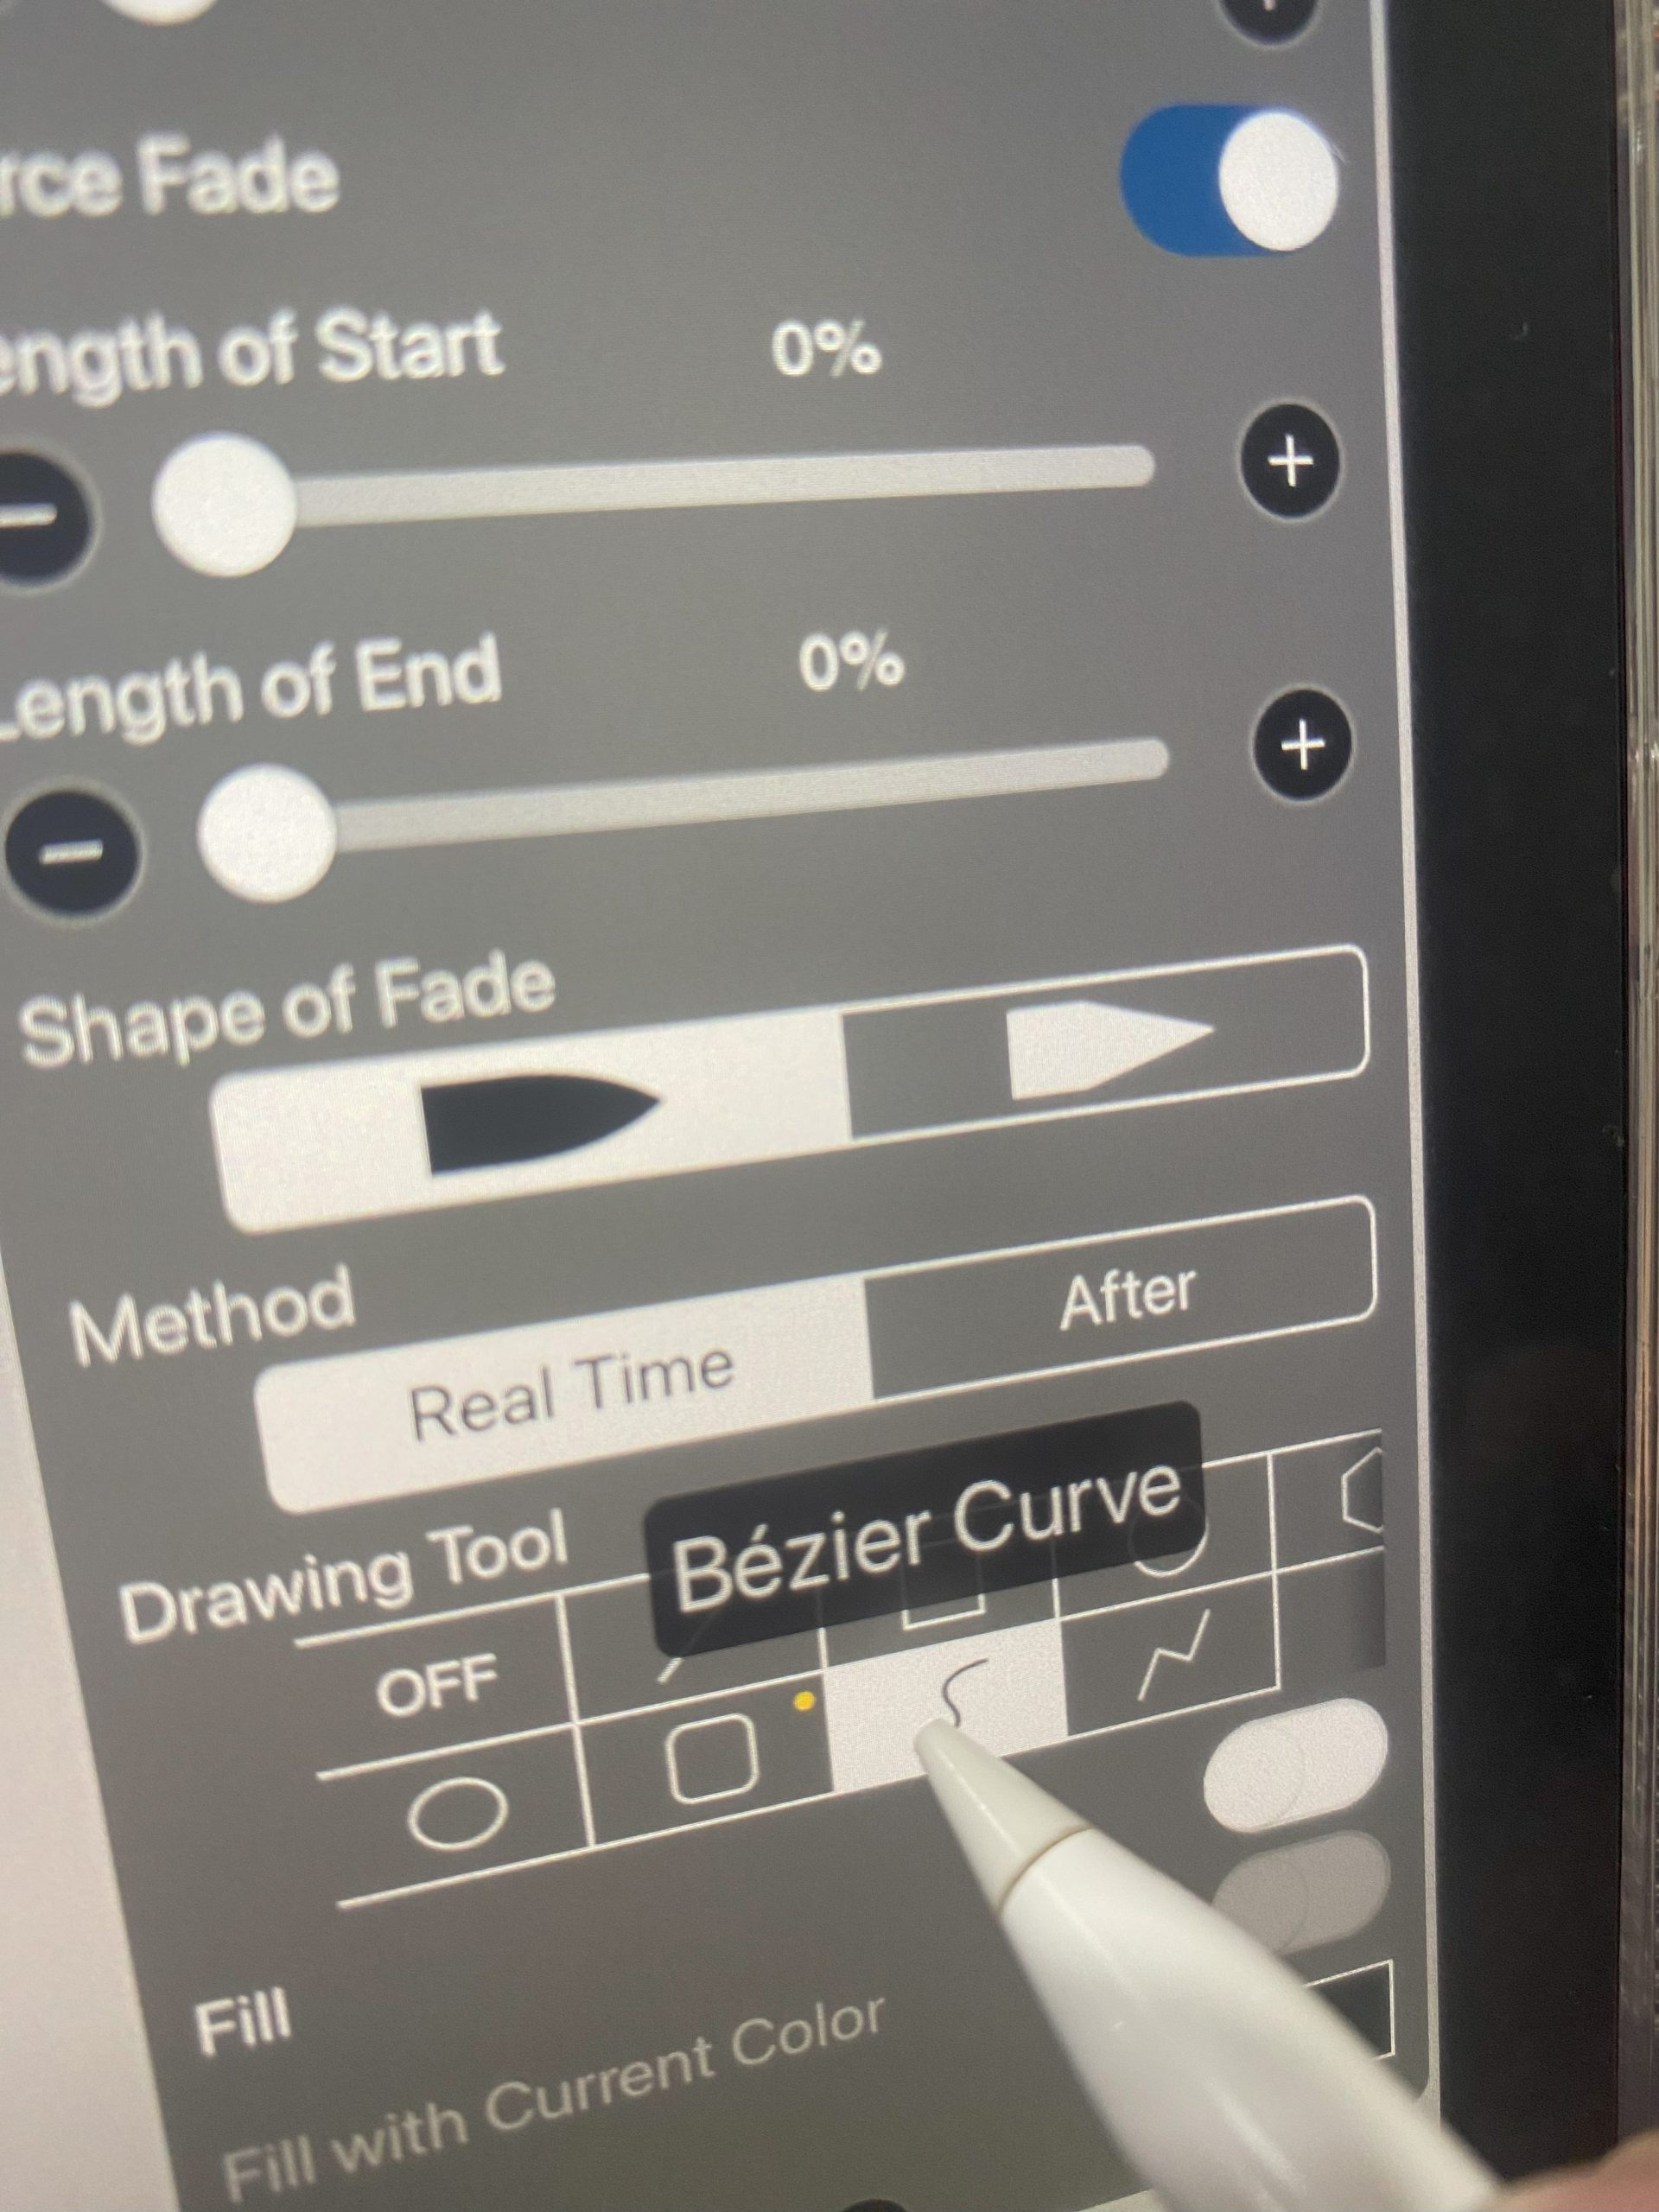
9. Why Bézier curve is the best?
Sometimes I draw a little past the outline, but that’s no problem, the Bézier Curve lets me adjust it. This makes the curves and lines very smooth.
10. Secret Tip #2: Layerings!
Once I’m done with the Bézier outlines, I split the drawing into layers. Layers for characters, props, other details, backgrounds, and so on. That way, if anything overlaps, I can erase or fix it without messing up the whole page.
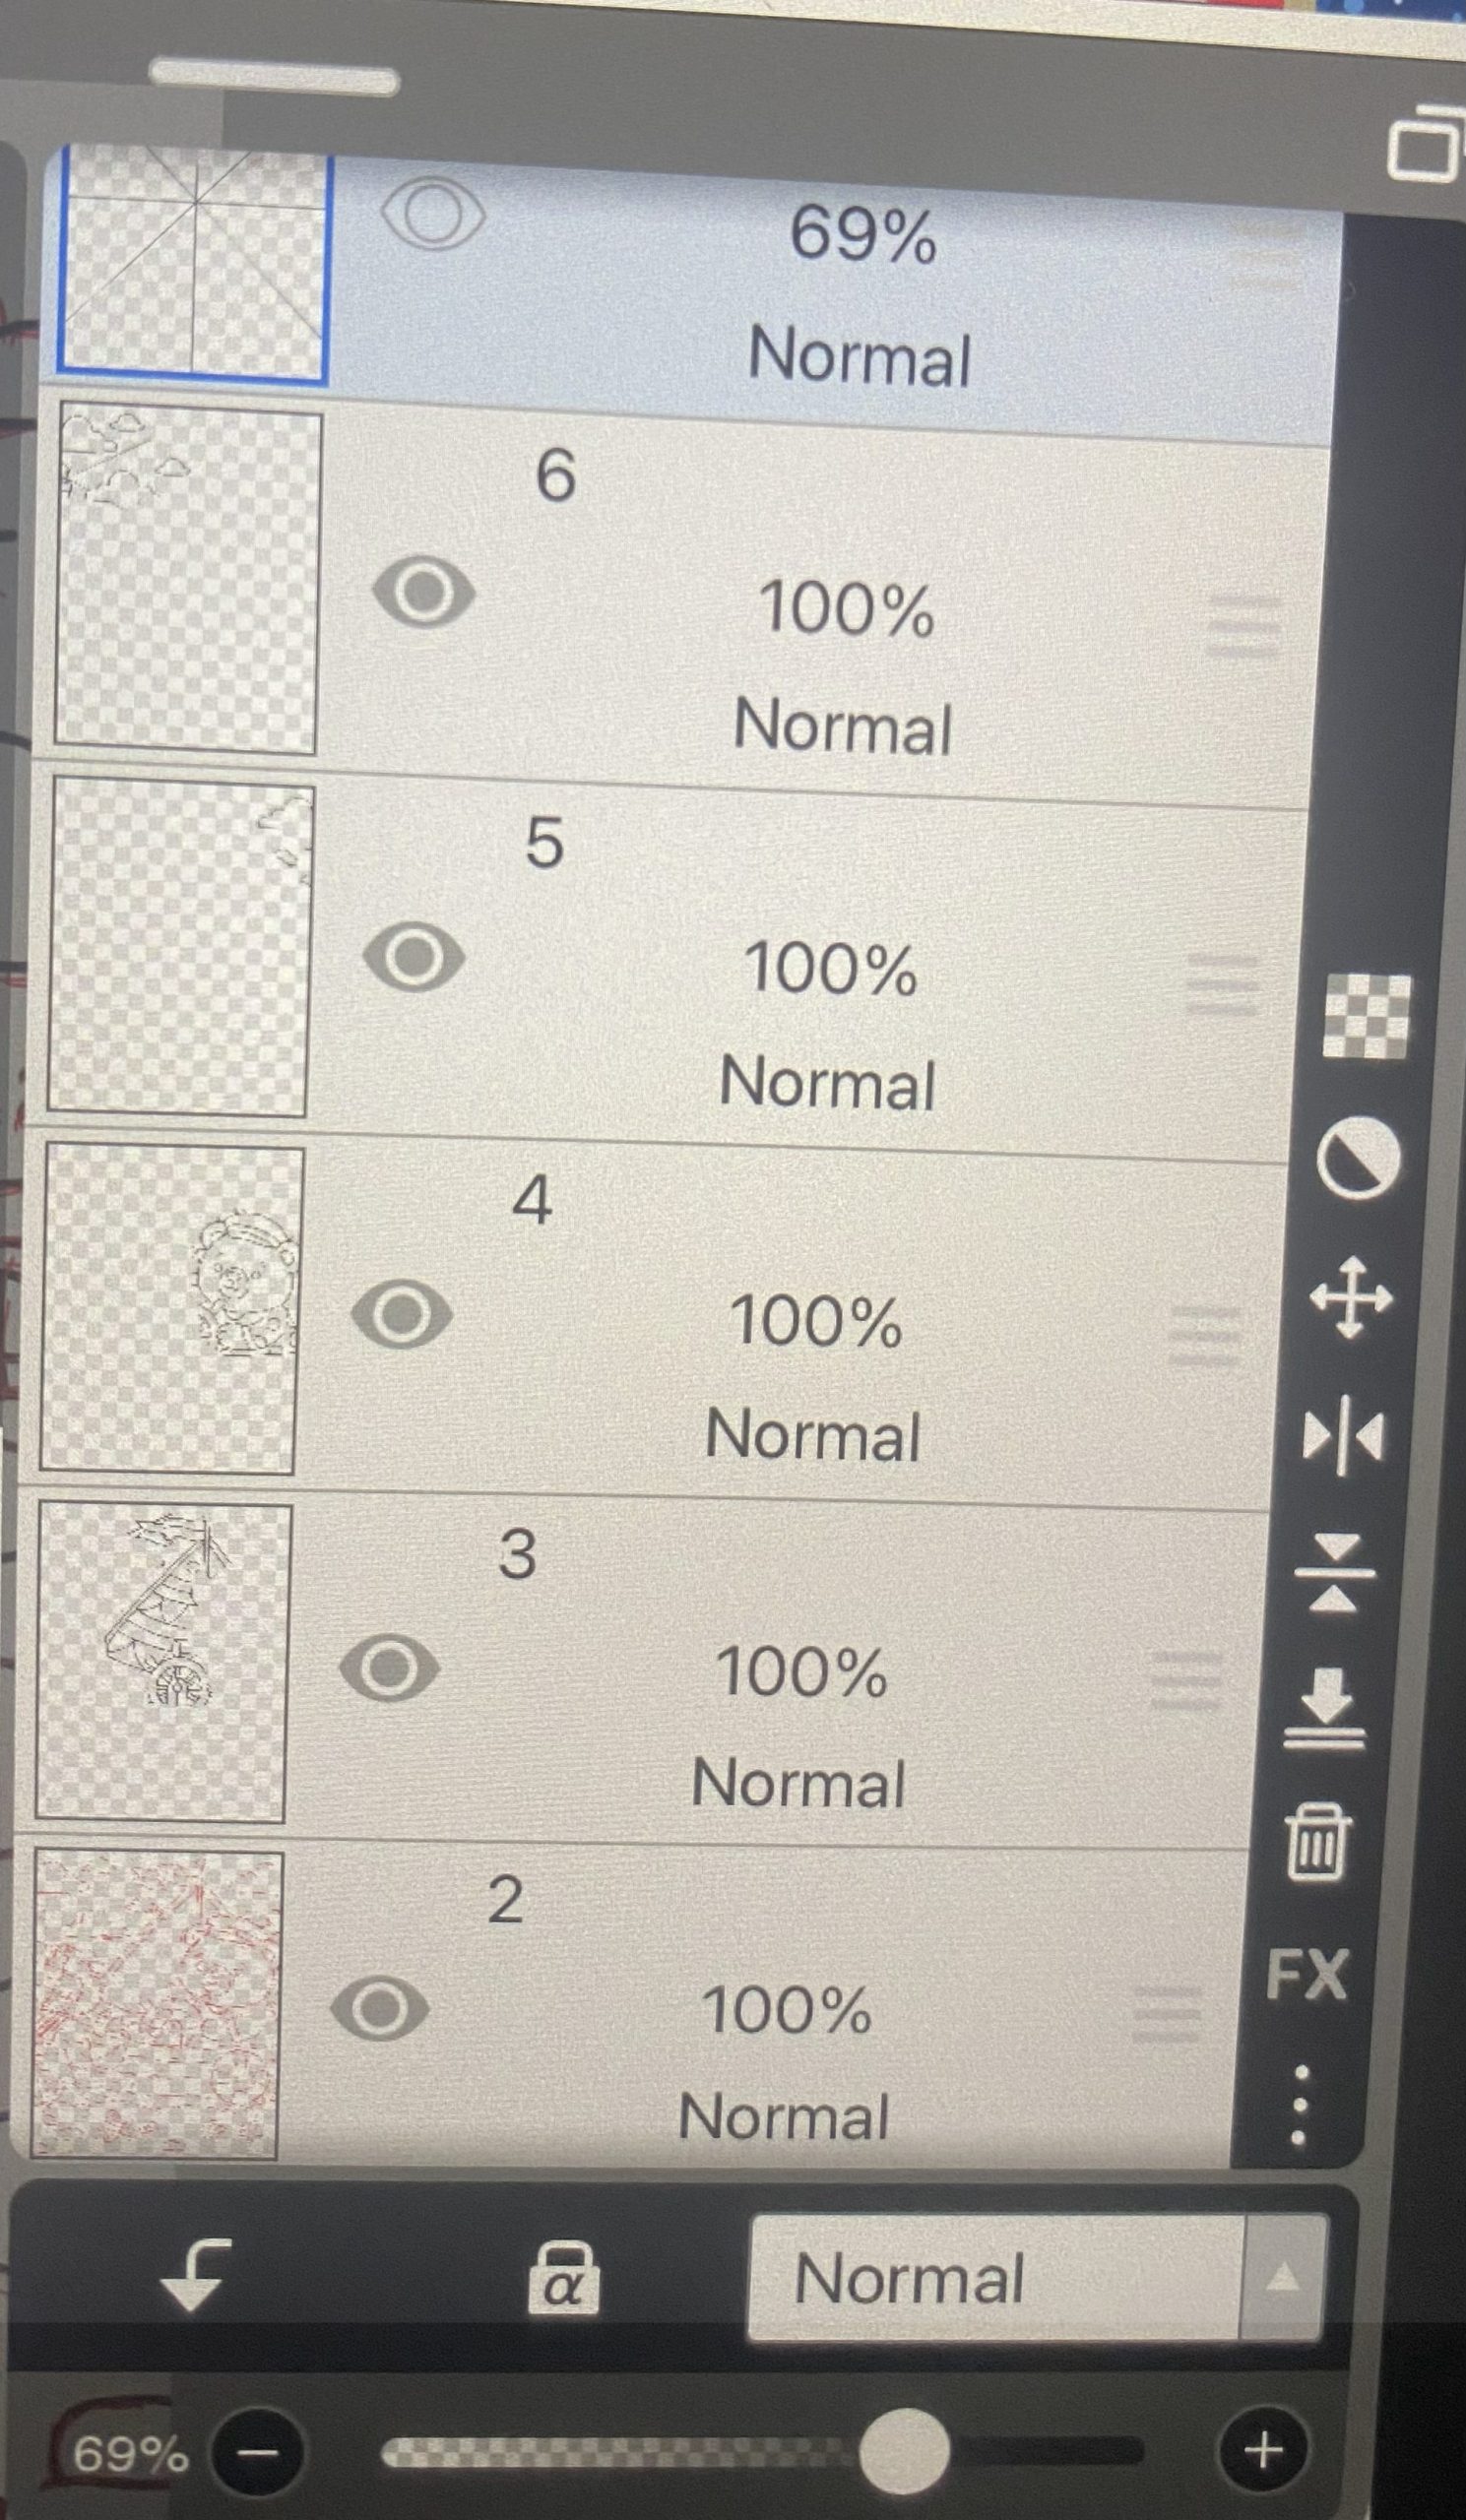
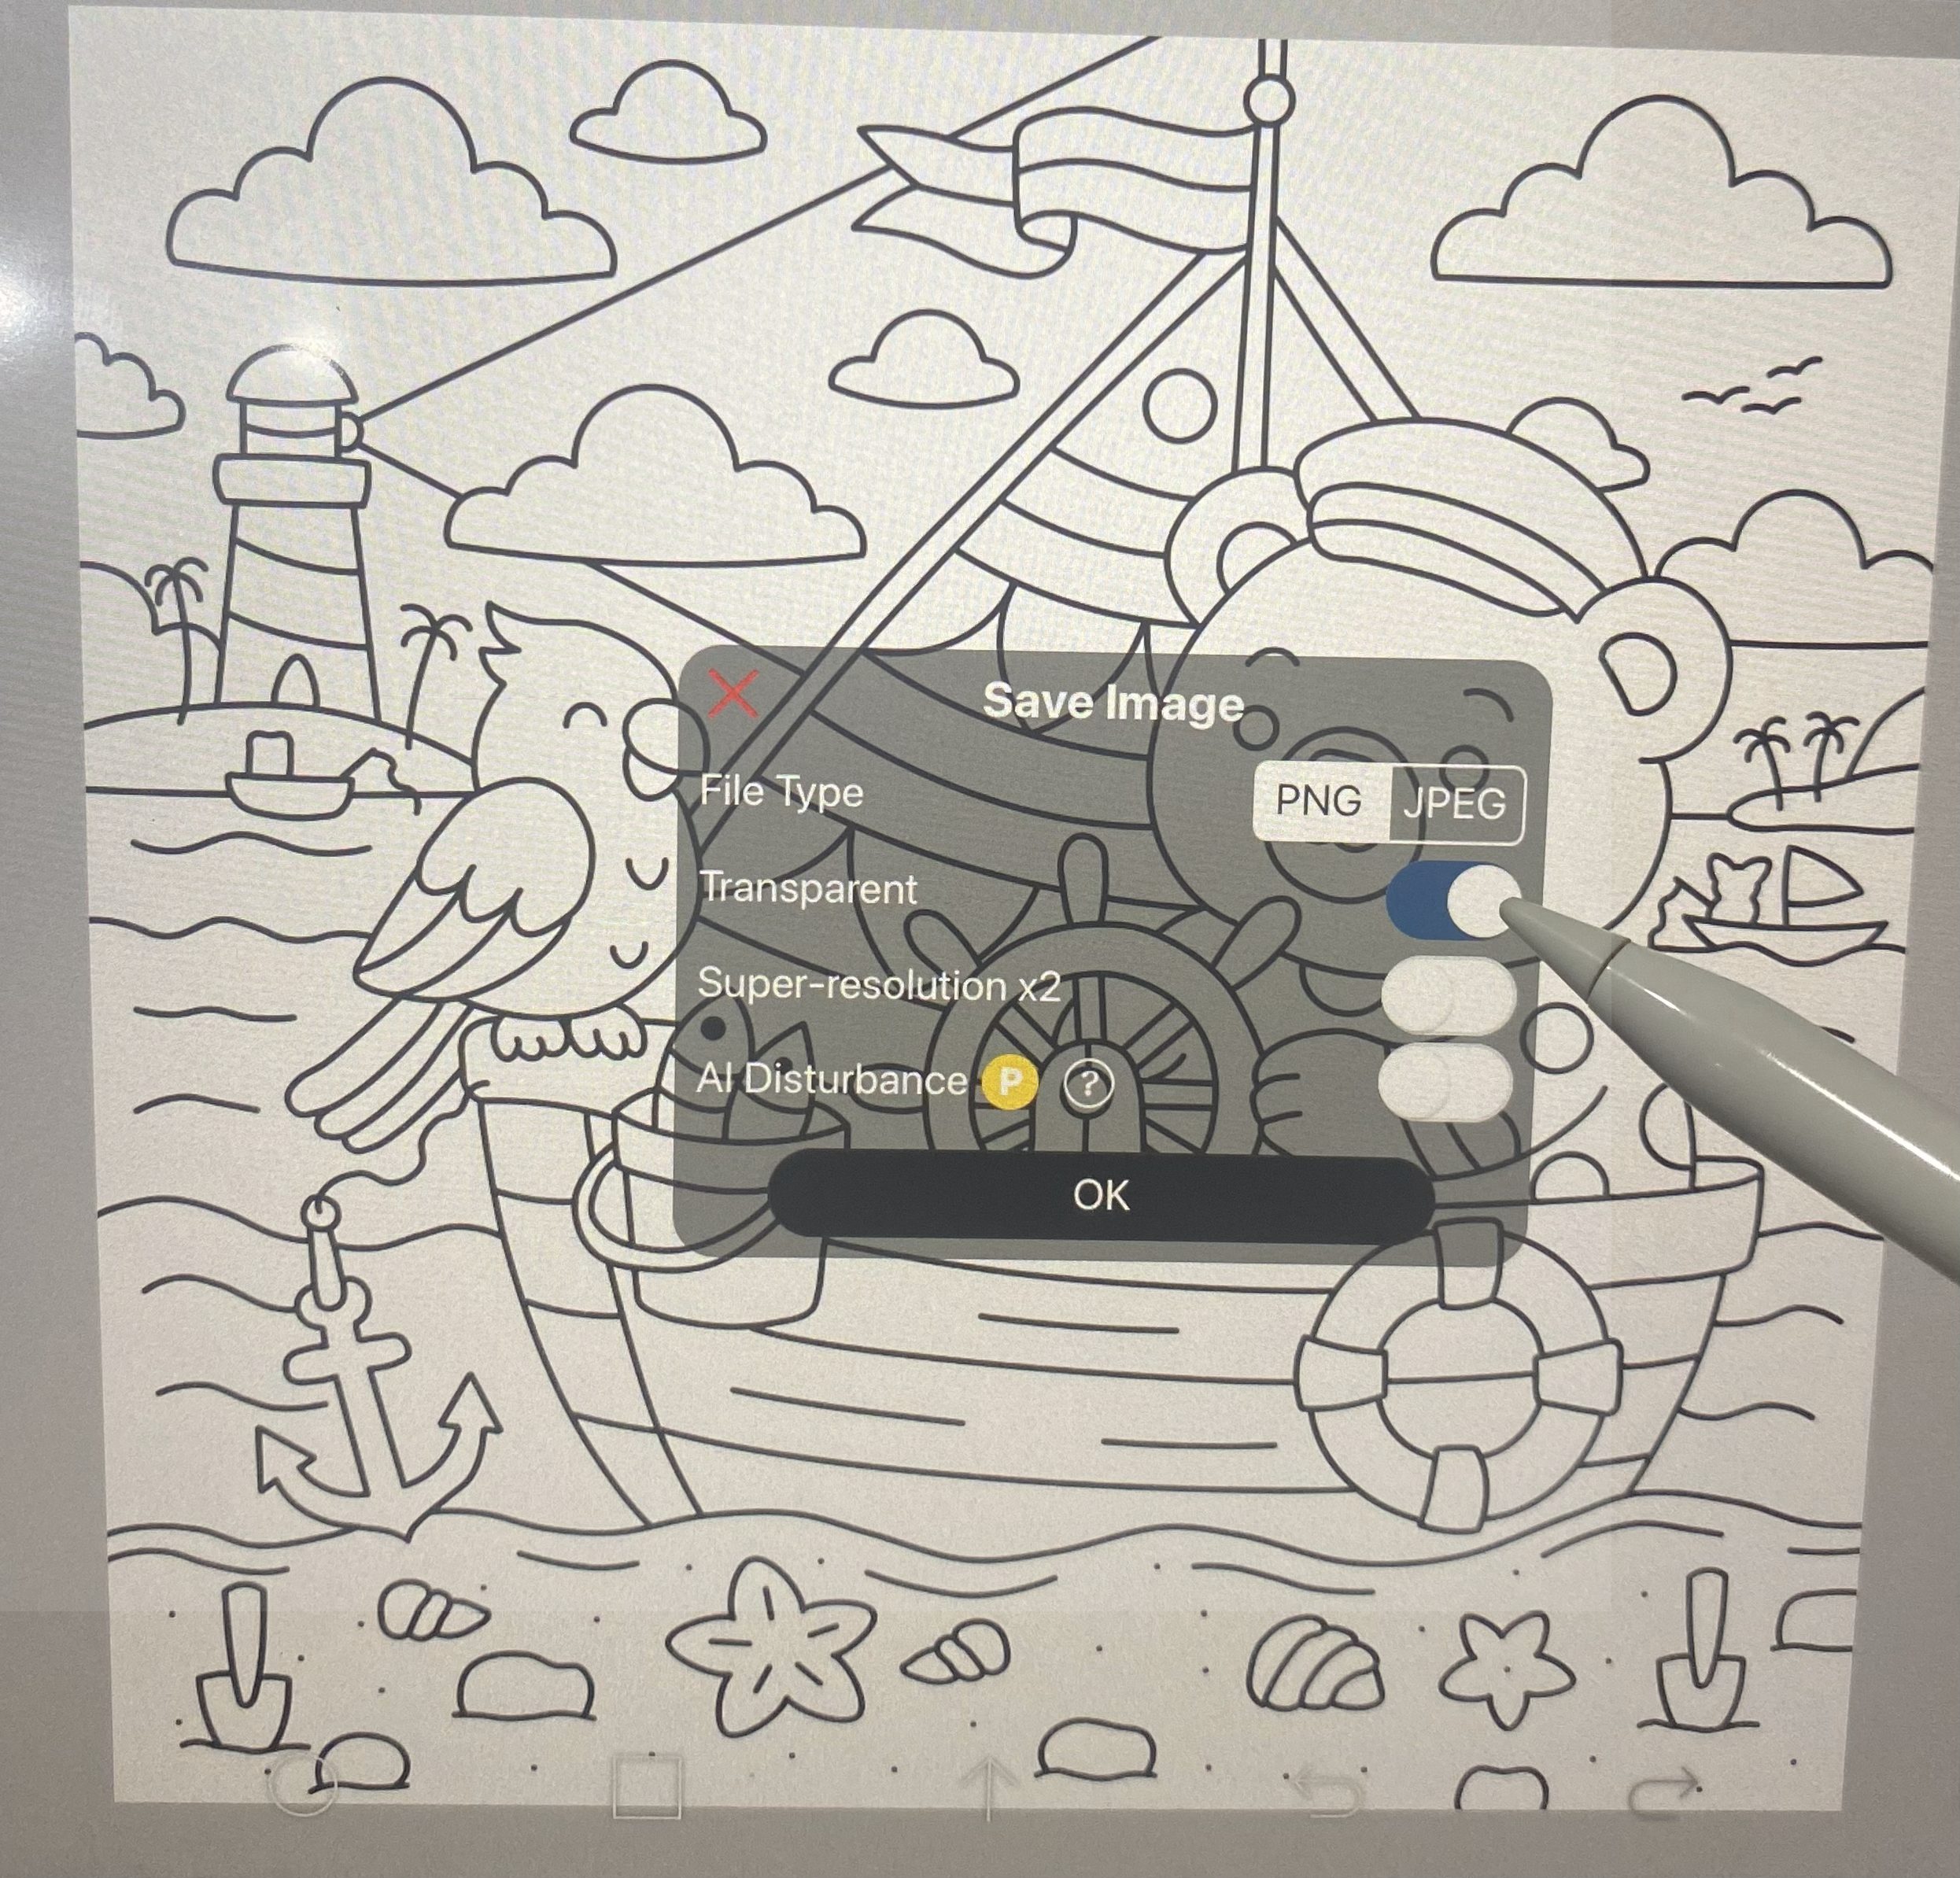
11. Transparent Export!
Once all the layers are put together, I save the page as a PNG and switch on the transparent option. That way, it saves just the outlines without any background.
Once downloaded, the transparent PNGs are applied to a white canvas to guarantee sharp contrast and an optimal coloring experience.
12. Finished Coloring Page
Once the transparent PNG is uploaded to the canvas and framed with a border, the coloring page is complete. From there, it’s shared on our website and added to the online coloring tool. Hopefully this gives a clear picture of the process for anyone curious.

Fishing Boat
Ben the bear and his parrot buddy Poppie set sail for a fishing day full of laughs, snacks, and seaside vibes. Anchored and ready – just waiting for a nibble!
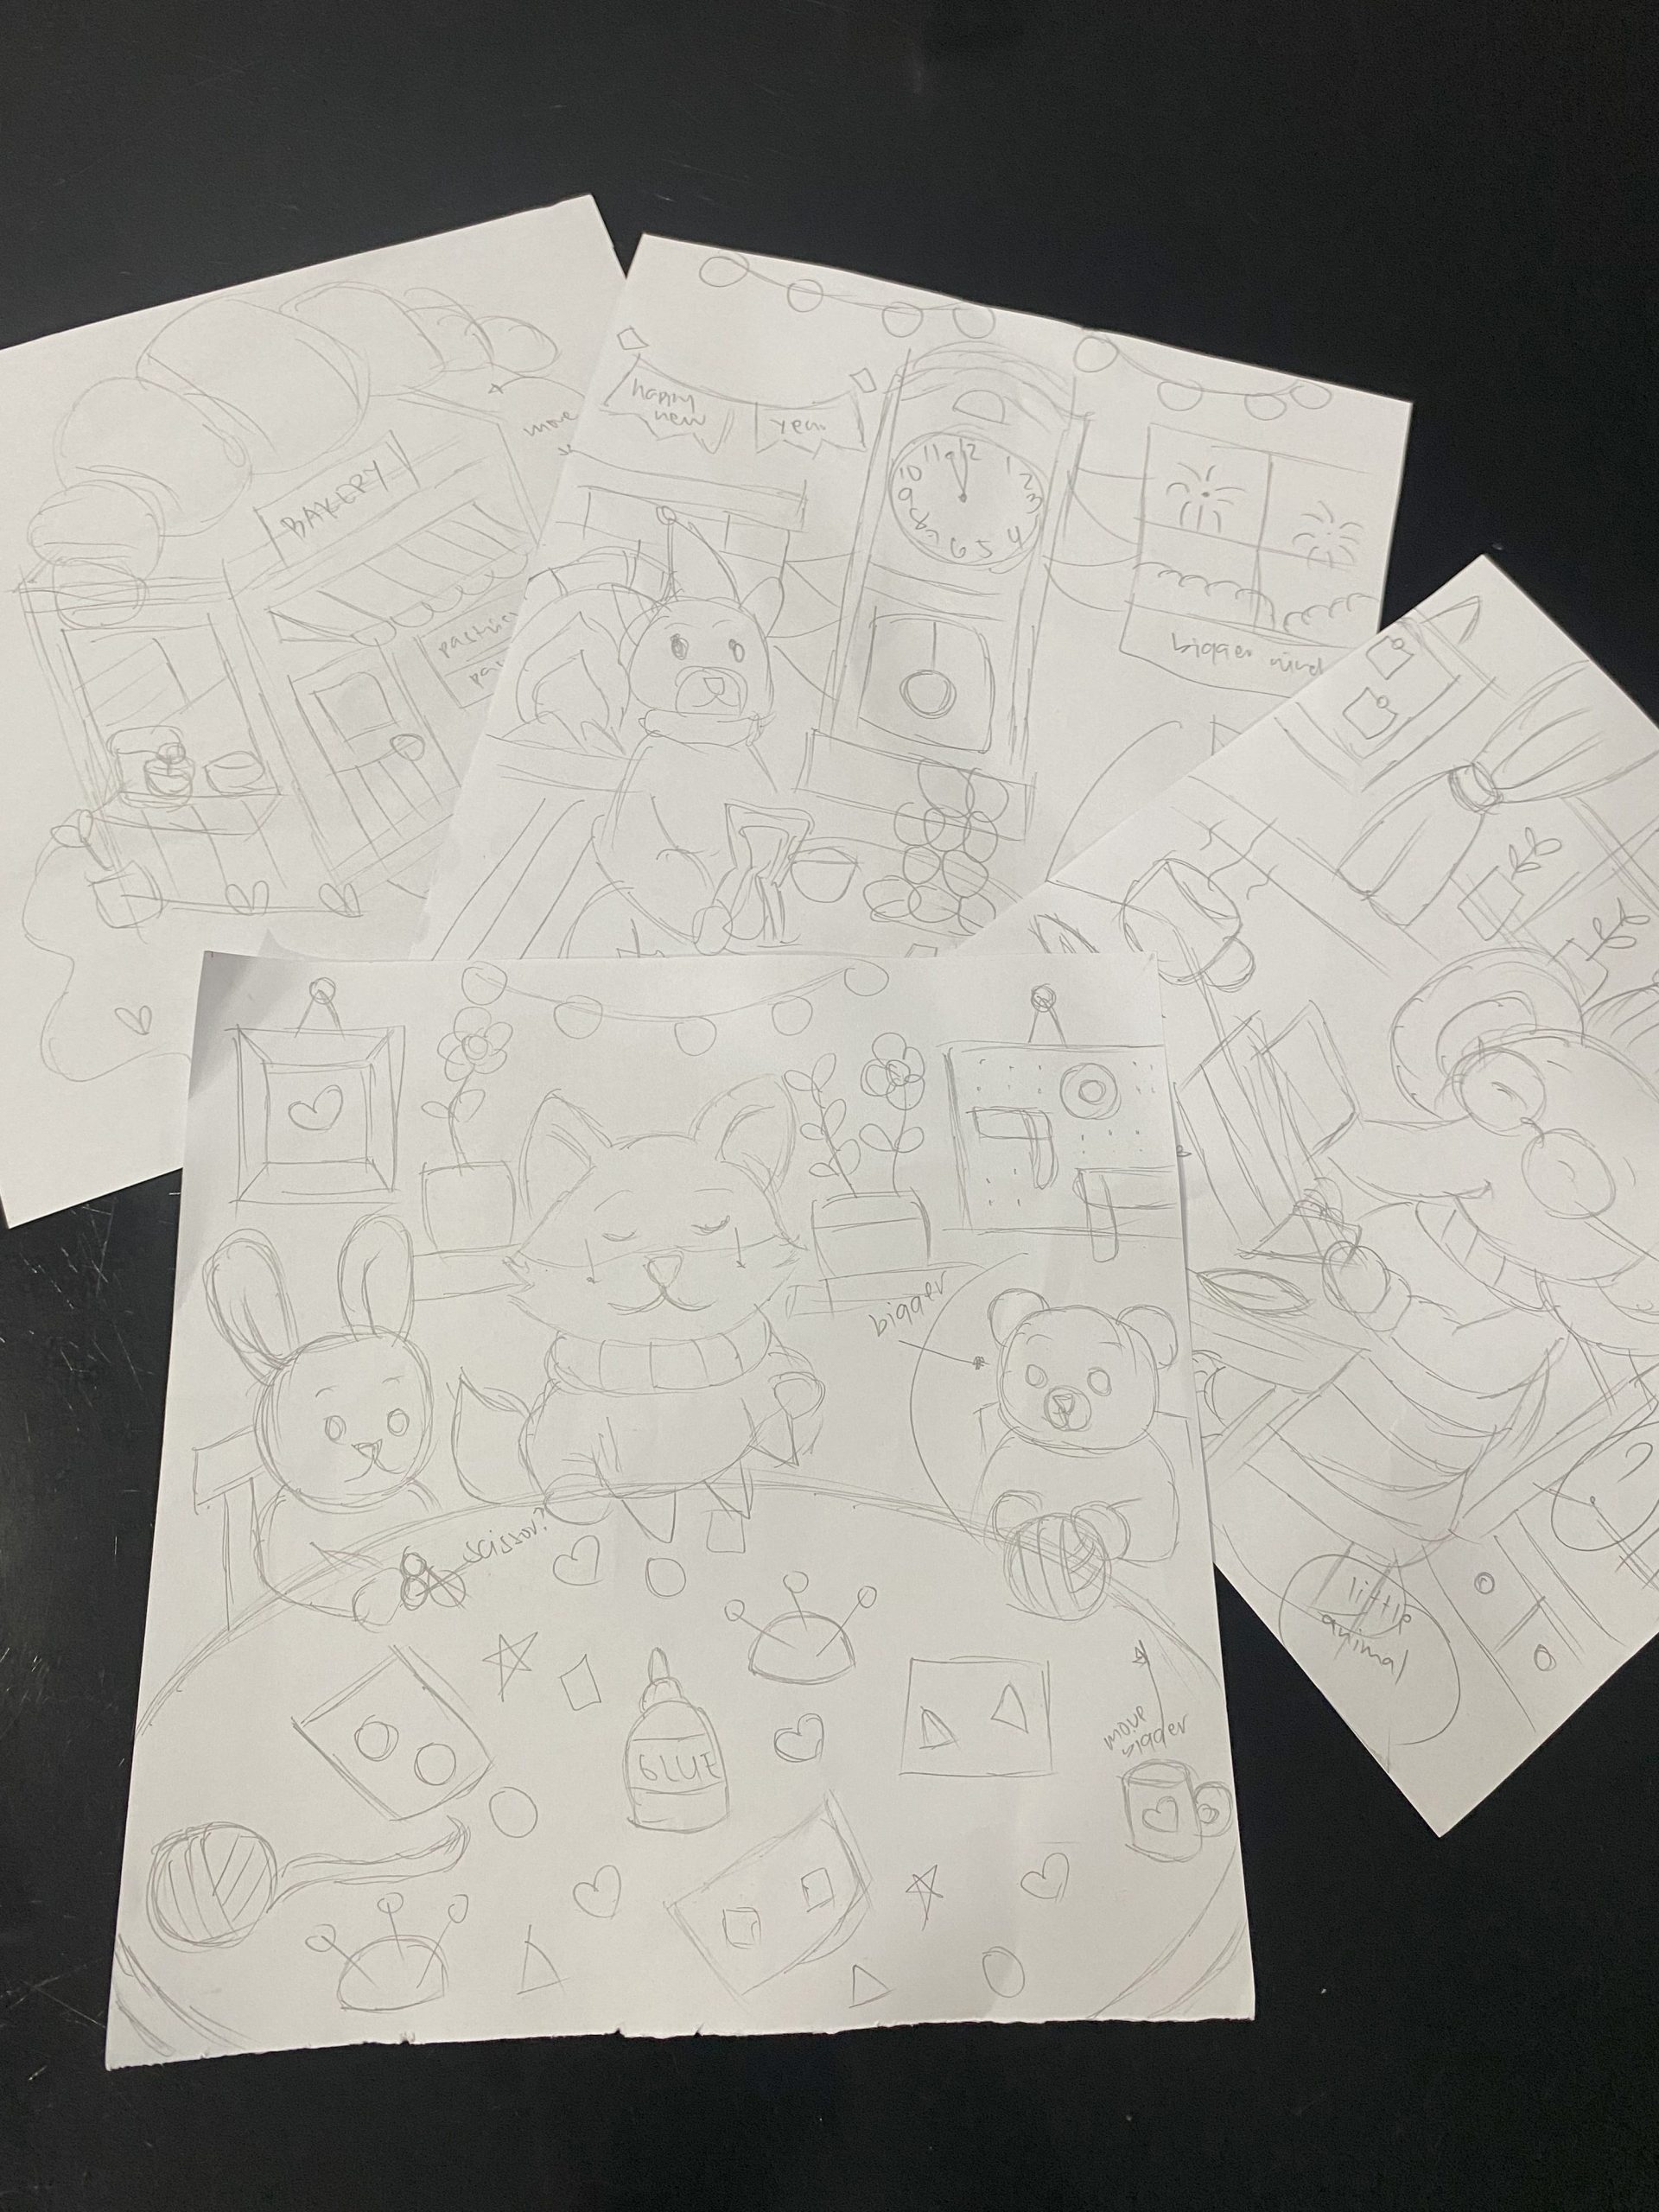
Here are a few more of my sketches before they became finished pages:
And that’s all! Now it’s your turn to try making a coloring page. If you get stuck or need advice, just ask in the comments, I’d love to give you some guidance.
Also see which supplies the team use to color pages.